Monthly Archives

September 2022

6L80 vs 6L90: Devil’s in the Details

6L80 vs. 6L90: Devil's in the Details - Gearstar Performance Transmissions

The 6L80 and 6L90 are two of the most popular rear-wheel transmissions from General Motors. So many things have been discussed about these remarkable transmissions. This is especially true since several of these units are malfunctioning and require rebuilding. It shouldn’t be surprising that the 6L80 vs 6L90 transmission units are reaching their prime age in the repair cycle. However, technicians constantly need to rebuild these units across the country primarily due to a lack of appropriate attention to detail. Friedrich Wilhelm Nietzsche states, “the devil is in the details.” Here’s a quick look at the areas that must always be addressed when rebuilding a 6L80 vs 6L90 transmission.

6L80 vs 6L90 Differences

To know the differences between the 6L80 vs 6L90, it is expedient to check out each of these transmission units.

6L80 Transmission

The 6L80 transmissions heralded significant changes in the overall design of automatic transmissions fabricated by General Motors. All previous automatic transmissions by GM were based on hydraulic controls. These transmissions continually received electrical elements the more they modernized. But the 6L80 transmission was developed from the ground up as an electric-over-hydraulic transmission, complete with microprocessor control. The manufacture of the 6L80 began in 2005 and was released in most GM vehicles in the model year of 2006. The transmission lasted until 2016, available in 6L80 vs 6L90 versions.

6L90 Transmission

GM introduced a stronger variant of the 6L80 transmission within a year, known as the 6L90 transmission, RPO code MYD. This version of the automatic transmission is 1-3/8 inches longer than its predecessor, the 6L80, with approximately 25 percent of the internal components of the new transmission differing from the old variant. In other words, the 6L90 Transmission is a heavy-duty version of the 6L80 six-speed automatic. Engine torque rating increases to a minimal degree, but the output torque rating of this transmission jumps up by almost 220 feet per pound to 885 feet per pound.

In addition, the 6L90 transmission comes with a reinforced input gearset with two extra pinion gears, i.e., 6 in total, and a strengthened output gearset that utilized wider gears than its predecessor. The flexibility of the 6L90 transmission extends to the clutches as the latter has an additional clutch plate in every clutch than the 6L80 for heavy-duty applications. However, a 6L90 version lacks the additional clutch plate that can match application requirements where appropriate. The 6L90 transmission differed from its predecessor’s long-standing GM 32 spline specification output shaft to efficiently handle the significantly increased output torque capacity.

Instead, it went for a large diameter of 29 splines for most truck applications. But some HD trucks and 2WD van versions had a 36 spline. This is why it is essential to be mindful of your output shaft version before you proceed with any adaptation. As mentioned earlier, the 6L90 transmission shares up to 75 percent of its components with its 6L80 counterpart. However, the case of the 6L80 transmission is 35mm longer than the case of the 6L80 transmission. Moreover, the 6L90 transmission case accommodates additional fasteners between the transfer case and the transmission for enhanced driveline vibration/noise performance.

6L80 vs 6L90 Damage Differences

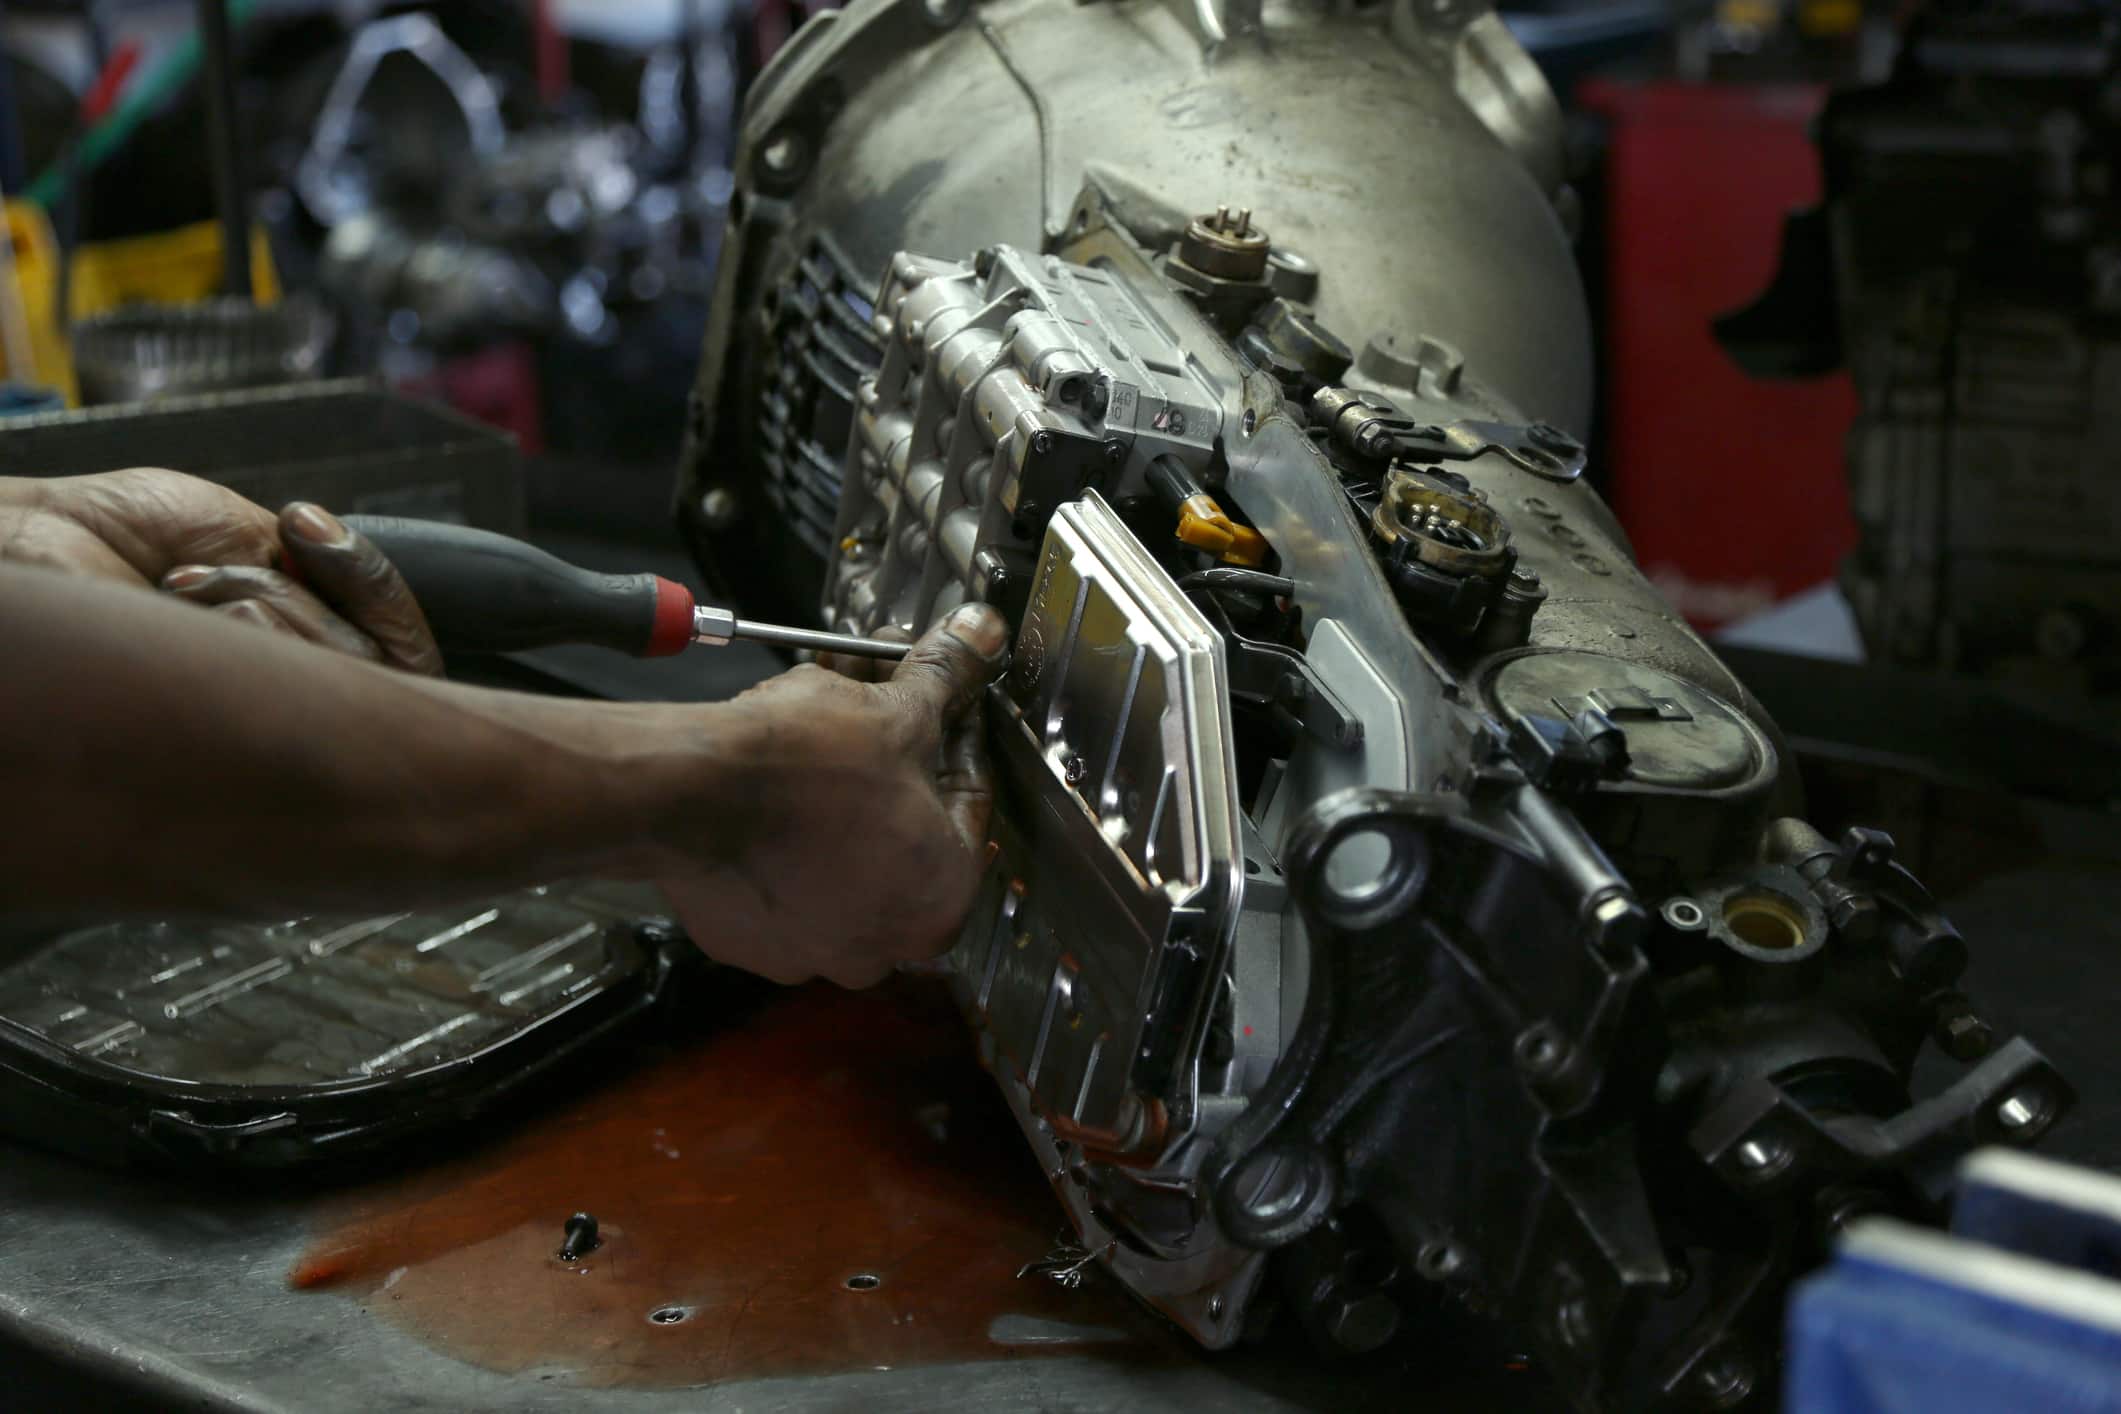
The 6L80 vs 6L90 transmissions usually get damaged around the pump area. The defect is mainly attributed to a torque converter failure. Most machinists and DIY enthusiasts know that torque converter failure is the #1 issue that grounds these transmission units. A total of 0.o1o inches to 0.015 inches of material is removed from the bell housing and stator support to restore the surfaces on typical pump assembly repairs. In addition, the depth of the pump pocket is restored by removing material from the surface of the bell housing.

This precise dimension must be matched for proper slide and rotor clearance. Most mechanics remove just enough material to restore the pump pocket and then get rid of an equal amount from the surface of the pump to maintain OEM dimensions. Some processes also include removing some material from the surface of the bell housing-to-case. Most rebuilt 6L80 and 6L90 transmission units have approximately 100,000 miles on them. Nevertheless, unit clearance should always be checked and modified accordingly, anyway.

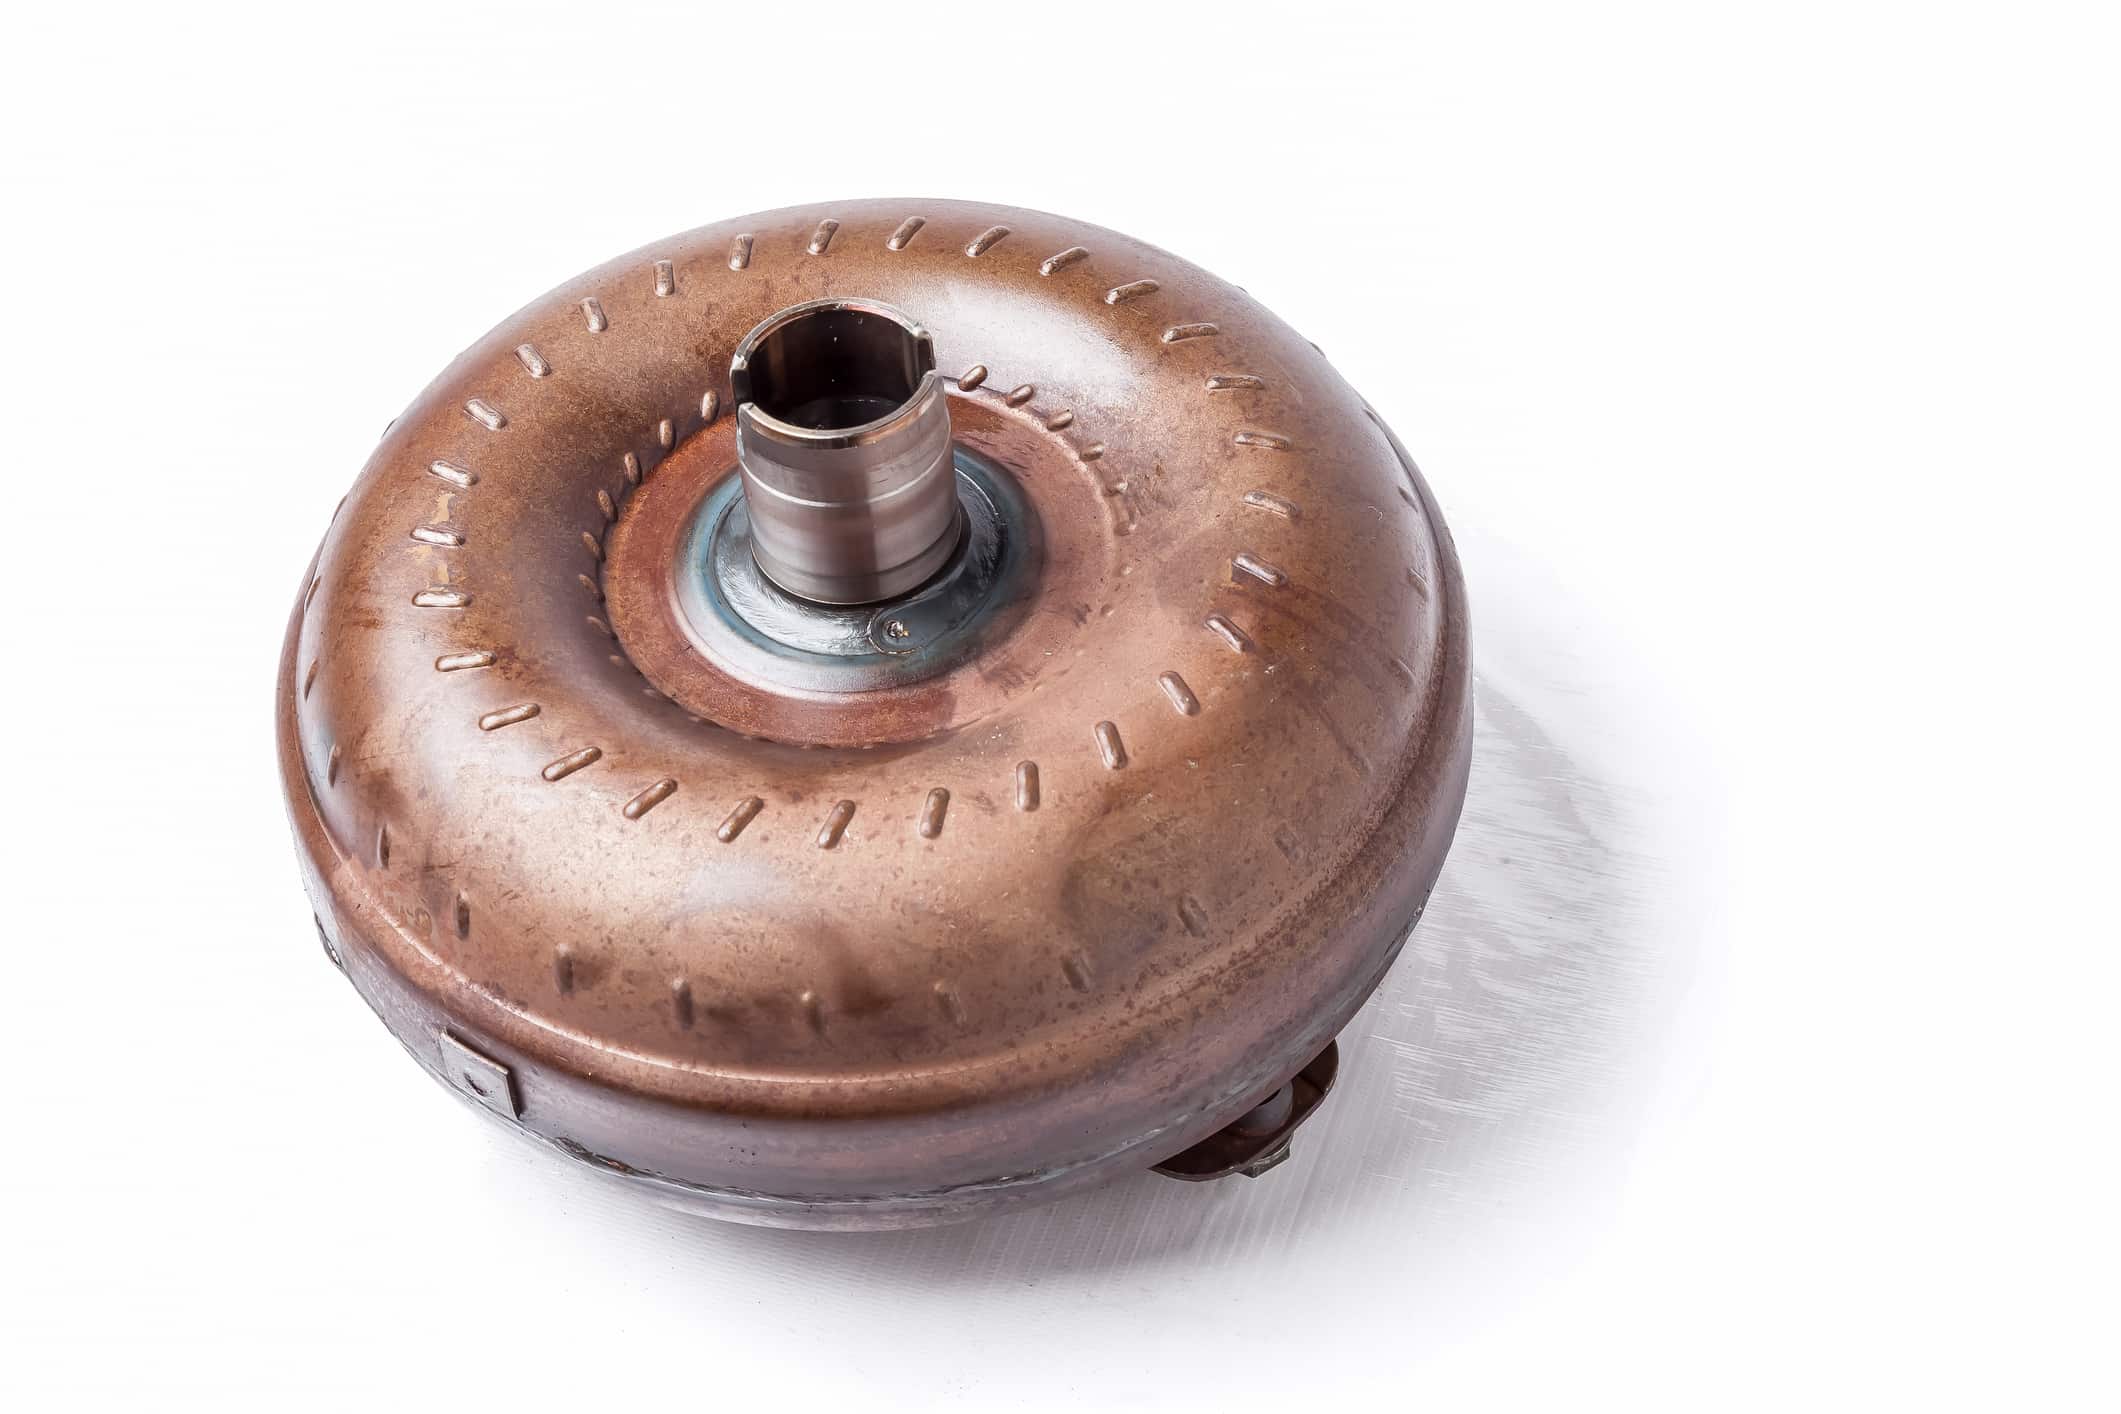
Signs of a Failing Torque Converter

The primary job of a torque converter is to prevent the vehicle from stalling when it comes to a stop. The torque converter also multiplies engine torque beneath acceleration to enhance pulling power. The torque converter is located between the transmission and the engine. One side of the torque converter bolts to a flexplate at the back of the engine, while the other side fits perfectly over the transmission’s input shaft. The entire torque converter assembly is composed of 5 primary components:

  • Turbine
  • Stator
  • Impeller
  • Front cover
  • Clutch

Here are the common signs you will notice when your torque converter goes bad:

Shuddering

The shuddering of a torque converter is a noticeable problem, resulting in vibration before or after the lockup of the torque converter clutch. If you drive an old model vehicle, you usually feel the vibration around 40 to 50 miles per hour when the clutch lockup occurs. But for late-model vehicles that gradually apply the torque converter clutch, the shuddering of this unit may occur at different speeds.

Overheating

When a converter clutch stays locked up, it can cause a significant increase in the temperature of the engine coolant. Likewise, a locked stator one-way clutch can cause your vehicle engine to overheat, especially under cruise conditions. In addition, a locked one-way clutch may cause the transmission fluid to get incredibly hot. This potentially leads to internal transmission damage.

Stalling

When the torque converter clutch fails to release, your vehicle may stall, especially when coming to a stop. The problem will feel like you’re driving a car with a manual transmission and stopping to engage the clutch after releasing the pedal.

Key Takeaways

The 6L80 and 6L90 transmissions were powerful in their heydays and were released in several vehicles. However, they are prone to damage usually caused by the failure of the torque converter. This has resulted in a consistent pattern of transmission failures across the country, as evidenced by tech specialists. Knowing the specifics of these transmissions makes it easier to rebuild them into long-lasting automatic transmissions that will perform remarkably well for extended periods.

Bad Torque Converter Symptoms, Diagnosis, and Fixes

Bad Torque Converter Symptoms, Diagnosis, and Fixes - Gearstar

The torque converter is a complex, highly sensitive, and vital part of your vehicle. A hydraulic coupling transfers your engine’s power to the transmission. Torque converters can perform this function because they are filled with automatic transmission fluid. On a fundamental basis, the torque converter is an excellent alternative to the mechanical clutch in standard manual transmissions. This is because torque converters in perfect working conditions multiply torque at lower revolutions per minute (RPM). This allows for more power than is usually possible via simple fluid coupling. However, when torque converters go bad, it can be worrisome. This is why it is crucial to know bad torque converter symptoms. This will make diagnosing it easier, and proper steps can be taken to fix the issue.

Symptoms of a Bad Torque Converter

These are the symptoms you should take note of as they inform you that your torque converter may have gone bad:

Illuminated Check Engine Light

The transmission control module (TCM) monitors the operation of torque converters in modern vehicles. If this module notices an issue with the torque converter or control circuitry, the device immediately switches on the Check Engine Light. It will also rapidly store a DTC (diagnostic trouble code) in its memory. Some vehicles switch on a dedicated transmission light when there’s a torque converter problem.

Slipping between Gears

Automatic cars are designed to shift smoothly between gears. You can feel the seamless transition, especially when you step on the gas pedal or decelerate quickly. However, suppose you feel your vehicle slipping between gears when it shifts. If you experience difficulty staying in a particular gear or the shifting feels somewhat strange or rough, there’s a great chance you’re plagued with a torque converter issue.

Shuddering 

This is a relatively common torque converter issue that often results in vibration, usually before or after the clutch lockup of the torque converter. If you own an older automatic vehicle, you may notice this vibration when driving at 40 to 50 MPH, which is when lockup occurs. But if you drive a late-model car, the shuddering may occur at different speeds since these vehicles usually apply the torque converter clutch gradually.

Leaking Transmission Fluid

The transmission fluid is crucial to a torque converter’s overall health and performance, including the entire transmission system. Unfortunately, torque converter seals can get worn out or damaged over time. This makes them prime sources of transmission fluid leaks. If your transmission fluid starts leaking, you shouldn’t waste time or take chances. Something is wrong with your torque converter, and a professional must check it out as soon as possible.

Loss of Acceleration

Is your vehicle feeling more sluggish than usual, and acceleration is now a struggle? You could have transmission issues, and the torque converter is the most likely culprit behind it.

Overheated Transmission

Your vehicle’s transmission comes with a highly sensitive temperature gauge that quickly detects when the transmission is overheating. It warns you of this development so that a certified transmission professional can get your vehicle looked at as soon as possible. Your torque converter may fail, or internal damage may require urgent attention.

Weird Noises

There may be trouble if you suddenly notice a whining noise from your torque converter. This whining noise implies that the pump within the torque converter is no longer functioning as designed. The noise could imply that the blade assembly no longer receives enough fluid. This can cause everything to run together, which is not supposed to be.

Diagnosing a Bad Torque Converter

You don’t need a professional to diagnose torque converters issues. This is something you can do by yourself. However, you will need the professional assistance of a certified torque converter technician to confirm your suspicions and fix them as soon as possible. Follow these steps to diagnose the issue and listen carefully for unusual occurrences like shuddering, strange noises, slipping, etc.

  1. Start your vehicle and allow the engine to run for several minutes.
  2. Apply light pressure on the gas pedal a few times.
  3. Push the vehicle’s brake and shift the gear into drive.
  4. Shift through each gear slowly.
  5. Drive around the neighborhood and listen attentively for unusual sounds each time you accelerate.

These steps may appear simple, but they can distinguish between driving with a bad torque converter and a good one. It is also easy to confuse torque converter issues with transmission problems. This is where the professional assistance of a torque converter specialist comes in. A specialist knows what to do to check for torque converter problems.

Fixing a Bad Torque Converter

Fixing a bad torque converter may save you a few bucks, especially if it is so damaged that you need to replace it with a new one. However, fixing or replacing a bad torque converter is more cost-efficient. If you keep driving your vehicle with a bad torque converter, the latter will cause considerable damage to the components within your transmission. You will spend a lot of money fixing those issues and still fix or replace the damaged or bad torque converter. A stitch in time, they say, saves nine. Therefore, get your vehicle to the nearest auto mechanic shop and get the torque converter specialist to look it over. Share your suspicions with the professional, as this will make it faster for them to readily diagnose or confirm issues using special equipment.

Conclusion

You can avoid torque converter problems if you know the symptoms to watch out for. The most obvious signs have been highlighted above. However, if you notice any of them, it is high time you get your vehicle’s torque converter checked out by a certified and trusted specialist. The cost of fixing or replacing your torque converter should not be an issue, especially if you consider the severe damage it may cause to your transmission if you don’t fix it on time. Therefore, always watch out for these signs each time you drive your vehicle. As soon as you notice any torque converter trouble shared above symptoms, take the necessary action.

Ultimate 700R4 Rebuild Kit Guide

Ultimate 700R4 Rebuild Kit Guide - Gearstar Performance Transmissions

“What 700R4 rebuild kit is right for me?” This is the question of a prospective rebuilder searching for the best 700R4 rebuild kit on the market. The 700R4 automatic transmission is 4-speed in Chevrolet and GMC cars and trucks. General Motors launched this automatic transmission in the early 1980s, an upgrade to the popular 3-speed TH350 transmission and the older models of rear-wheel-drive vehicles.

The primary aim of developing the 700R4 automatic transmission was to improve fuel economy in vehicles significantly. This aim was achieved successfully, thanks to the 30 percent overdrive in 4th gear it featured. In addition, the overdrive allowed pickup trucks and sports cars that came with it to be even more affordable to use or drive. The 700R4 transmission is featured in vehicles – including rear-wheel-drive cars and trucks – from 1982 to 1993. Here are some of them, arranged in no particular order:

GMC

  • Jimmy: 1982 – 1993
  • Syclone: 1991 – 1992
  • Safari: 1983 – 1990

Chevy

  • Blazer: 1982 – 1991
  • Camaro: 1983 – 1992
  • Corvette: 1982 – 1992
  • Astro Van: 1985 – 1992
  • Suburban: 1984 – 1992

Cadillac 

  • Brougham: 1990 – 1992
  • Fleetwood: 1990 – 1992
  • Limousine: 1990 – 1992

The last 700R4 transmission was produced more than 20 years ago. This shows that it has been around for some time and remains popular due to its adaptability and reliability. However, rebuilding a transmission from the ground up and for the first time can be daunting, especially if you’re not DIY-inclined. You must be 100 percent sure you possess the chops or skills to take on this challenging task. It starts with deciding or figuring out the primary goal of your 700R4 rebuild. For example, why do you want to rebuild your 700R4 transmission?

Do you want to save money and time by performing a basic repair so you can get back on the road as soon as possible? Vehicle owners do 700R4 transmission rebuilds for several reasons. First, your transmission may function remarkably well now; however, you are considering dropping it and doing a high-performance 700R4 rebuild to handle heavy-load situations. Some even perform in-depth 700R4 transmission rebuilds to eliminate any known OEM weaknesses. Whatever your reason for rebuilding a transmission, you need to be sure it is the right step.

What to Consider Before Starting the 700R4 Rebuild Process

You need to consider the following before embarking on your transmission rebuild process. Here they are in no particular order:

  • First, what year is the vehicle whose 700R4 transmission needs a rebuild?
  • Is the transmission unit damaged? What is the extent of the damage?
  • What hard components should you get before starting the transmission rebuild process?
  • Are molded rubber pistons in the transmission, or do they use piston lip seals?
  • Does your transmission unit make use of a bonded valve body plate?
  • Does your 700R4 transmission’s pump use an O-ring or wedge-style seal?

These are just a few questions/things to consider before embarking on your 700R4 transmission rebuild.

The 700R4 Rebuild Manual

A rebuild manual is essential, whether or not you have the necessary experience rebuilding transmissions. A rebuild manual showcases every intricate detail of the transmission you are working on. For instance, a different component may be located at another corner in a particular year. When it comes to standard transmission rebuild manuals, the ATSG Manual is a perfect choice. They have a 700R4 rebuild manual with brilliantly-sketched diagrams and top-notch information that helps ensure you are doing the right thing as you rebuild your 700R4 transmission. The standard transmission rebuild kit, known as the Alto PowerPack, comes with the following:

  • A new filter
  • High energy carbon band
  • Corvette Servo
  • Trans valve body separator plate

SA Design’s Builders and Swapper’s Guide

This extraordinary rebuild guide is ideal for a high-performance transmission rebuild. The guide is informal, making it easier for anyone to read and understand while wrenching on a vehicle’s 700R4 transmission unit.

Top Performance Transmission Rebuild Kits

Part of rebuilding a 700R4 transmission includes ensuring the unit is stronger and much more efficient than it used to be. The top performance transmission rebuild kit from B&M that helps generate more power includes:

  • High-performance materials
  • Made only for the 1987-1993 700R4 transmission in particular
  • Complete gasket set
  • High-performance springs and valves
  • Drain plugs
  • One-year warranty

700R4 Rebuild Kit With a Torque Converter

When choosing the appropriate torque converter for your unique application, several variables must be considered. You can re-order a stock converter if you only rebuild a 700R4 transmission. There is also nothing wrong with going for a torque converter with the same stall speed as your automobile had from the factory. However, if this is not the case, you will need to be incredibly careful when searching for a suitable torque converter for your vehicle. Modern LS-type engines make good power, but the stall does not have to be as extreme since the heads generate more power. This allows for a less aggressive cam profile, allowing the engine to retain decent bottom-end power efficiently.

700R4 Transmission Recommendations

Experts highly recommend replacing every friction material – e.g., band/clutches – and the filter when undertaking a 700R4 transmission rebuild. Moreover, OEM 700R4 transmissions come with several inherent weak points within the sun shell and the ¾ clutch packs. Therefore, ensure you make use of an aftermarket sun shell. Ensure you replace the front stator tube bushings, rear case, and pump body. Replace any other part that looks worn or scratched. After any transmission rebuild, you must always use a remanufactured or new torque converter. Also, don’t forget to install or rebuild a remanufactured valve body on every rebuilt transmission.

Conclusion

Rebuilding any transmission is not a walk in the park. The 700R4 transmission is one of the toughest today and has held its own for over 20 years. You can get the best 700R4 transmission rebuild kit, depending significantly on your budget and the power you want to put on the pavement.

6L90E Transmission Specs and Identification

6L90 Transmission Specs and Identification - Gearstar

The 6L90E is a high-performance component suitable for handling as much as 700 horsepower. This 6-speed automatic transmission built by General Motors powers everything from family sedans to audacious muscle vehicles, SUVs, and pickup trucks, alongside the 6L80E model. The 6L90E transmission is primarily designed for rear-focused all-wheel drive and rear-wheel drive vehicles. This remarkable AT is paired with GM’s V8 Duramax and V8 Vortec VVT engines.

This is why the 6L90E transmission is commonly used in GM diesel and heavy-duty trucks, including the Camaro ZL1 and cargo vans. General Motors manufactured the 6L90E in 2006, primarily designed for AWD/4WD and RWD applications. The 6-speed automatic transmission has several features, the most notable of which is the clutch-to-clutch function with a wide gear ratio for maximum efficiency and performance.

Difference Between the 6L80E and 6L90E Transmission

The 6L90E transmission succeeded the 6L80E transmission and is designed to transform the extra torque of the previous unit. The 6L90E transmission was critical as new vehicles with excellent or more significant performance were needed to hit the market. The primary differences between the 6L90E automatic transmission and its predecessor, the 6L80E transmission, can be traced to the internal hard components. First of all, the case of the 6L90E automatic transmission is shorter than its successor.

The reason behind this design was to enable the transmission to sufficiently accommodate extra physical gear assemblies. As a result, this transmission permits two additional pinion gears, equating everything to six. This critical modification is highly crucial for high torque and high RPM figures. In addition, this resulted in a large intermediate shaft to ensure 100 percent reliability, especially during loaded 3-4 upshifts where the shaft experiences great stress. Some applications came with many extra clutches across multiple clutch packs within the transmission. This increases the load capabilities of these clutch packs in the gears to which they are readily applied.

6L90E Transmission Specs and Ratios

The 6L90E automatic transmission provides optimum efficiency and 6-speed performance by taking full advantage of a much wider gear ratio instead of the conventional planetary gearset design. It has a die-cast aluminum casing with maximum input torque of 531 lb.-ft. and weighs approximately 245 lbs. with a torque converter and ATF. The 6-speed automatic transmission has a stall ratio of 1.9, a max shift speed of 6,200 rpm, a max GVWR of 15,000 lbs., and 29 spline output/shaft. It has zero PTO provisions and fluid capacity, approximately 13 quarts.

Gear Ratios

  • First gear: 4.027 to 1
  • Second gear: 2.364 to 1
  • Third gear: 1.532 to 1
  • Fourth gear: 1.152 to 1
  • Fifth gear: 0.852 to 1
  • Sixth gear: 0.667 to 1
  • Reverse: 3.064 to 1

This 6-speed automatic transmission is much larger than its predecessor, the 6L80E transmission, and features at least one more clutch plate in every pack than the 6L80E. This 6L90E transmission showcases a modular transmission case design that readily accepts numerous output shaft adapters and bell housings. This enables the transmission to be employed in various applications without requiring extensive modifications. It also doesn’t require complete application-specific transmission designs.

Features of the 6L90E

The 6L90E automatic transmission is electronically controlled and comes with a 300 mm torque converter. In addition, it is integrated with haul/tow settings that provide alternative shift schedules for high load conditions and decent speed control features. The heavy-duty version of the 6L90E automatic transmission has one additional plate in every clutch pack. This is necessary for stronger output/input gearsets. In addition, the modular design of this 6-speed automatic transmission makes for easy integration between a wide variety of engine applications. As with all transmissions, service intervals for the 6L90E transmission require changing the filter and fluid at 100,000 miles under normal or standard service conditions and at 50,000 miles under severe service conditions.

Common Defects of the 6L90E

The 6L90E has never been considered terrible when it comes to specification. Nevertheless, it has a few inherent design flaws that are worth mentioning. The well-known issues the 6L90E transmission has included:

  • Randomly popping out of ‘park’
  • Not shifting out of ‘park’
  • When in ‘reverse,’ it makes a loud rattling sound

The primary source of these issues is the plucking rod actuator assembly, which is notorious for its failure. Unfortunately, moisture also finds its way into the transmission’s casing and destroys the components that keep your vehicle functioning smoothly. Other common problems associated with the 6L90E transmission include:

  • Torque converter engagement or disengagement problems.
  • Hard shifts to third or fifth.
  • Transmission fluid over temperature.
  • Flare or slip on the 2-3 shift.
  • Slip in third or fifth gear.
  • No reverse or slip-in reverse.

The most obvious sign that the 6L90E automatic transmission has issues is when the reverse gear is slipping or no longer engaging. If you’re experiencing any of these problems highlighted above with your 6L90E transmission, take your vehicle to a certified technician. The technician or mechanic will check out the transmission and make some recommendations, such as checking or leveling up the transmission oil, replacing the torque converter if it’s worn out, changing the gearbox oil, etc.

Which Vehicles Have a 6L90E Transmission?

As mentioned earlier, General Motors uses the 6L90E automatic transmission on various trucks, cargo vans, and passenger vehicles. The weight capacity and superb torque handling of the 6L90E transmission make it perform exceptionally well in construction, commercial, and industrial settings. The Chevrolet Express/GMC Savana, Chevrolet Silverado HD, and GMC Sierra HD pickups started using this model in 2007 and keep doing so even today. Unfortunately, this makes some of the common issues associated with the 6L90E automatic transmission much worse due to the high usage and payloads they usually handle daily.

The Bottom Line

The GM 6L90E is a high-performance gear mechanism for handling as much as 700 horsepower. It is a 6-speed automatic transmission that powers everything from a wide range of vehicles, including family sedans, audacious muscle vehicles, SUVs, and pickup trucks, alongside its predecessor, the 6L80E model. The 6L90E is not perfect in every sense, but it is capable enough to still be in use today in many modern-day vehicles.