
If you’ve been a longtime reader of Classic Trucks, you might remember my F-1 project that I’ve been working on for the last handful of years. It’s been sidelined a few times, but I’ve finally wrestled it out of the shadows to breathe new life into the old Ford. As these things go, of course, I’ve changed the direction of the build over the years and have decided to save the early Hemi engine for another build and instead keep the early Ford all Ford.
The plan is based on a Speedway Motors 302 Ford Hot Rod Crate Engine that I’ve had squirreled away in a corner of my garage waiting for the right project to come around, the original one having been sold years earlier. Likewise, lying patiently in a crate sat a Gearstar Level 3 AOD transmission from the same, now defunct project. Like a perfect project storm, it all started to make sense; take out the early Hemi and install the all-Ford powertrain in the early Ford pickup.
To do so, the existing Hemi engine mounts had to come out, as well as the T5 transmission crossmember that was previously installed. From there, the Ford engine/trans combo could be dropped between the freshly prepped framerails, engine, and trans mounts sorted and away we go.
To mount the Ford engine, a call to Speedway Motors was made and a set of their weld-in Ford motor mounts (PN 91018045) was ordered. We then contacted Total Cost Involved to solve the transmission mounting requirements. Mating the crate 302 to the AOD requires a bellhousing separator plate, picked up from Summit Racing (PN SUM-700600), as well as a SFI-approved flexplate (PN 57530202), which was provided by Speedway Motors. With all the components on-hand, it was finally time to bolt the engine and trans up before swinging things between the Ford’s framerails.

The heart of our F-1 will be a Speedway Motor’s 302 Ford Hot Rod Crate Engine. Packing over 300 hp, not only will this small-block make our old Ford scoot, but it will also ensure our truck remains true to the Blue Oval moniker.
![]()
Mated to the 302 will be a Gearstar Performance Level 3 AOD transmission. Rated for up to 500 hp, this bulletproof tranny will ensure the power of our 302 gets put down to the pavement in short order and in a most reliable fashion. The overdrive gearing will also ensure our F-1 is capable of highway speeds without winding out the small-block. Gearstar’s transmission kit comes complete with a custom-spec torque converter, extra-capacity aluminum pan, dipstick and filler tube, ATF, trans mount, and custom 360-degree shift linkage arm.

The first order in mating the 302 to the AOD is installing the bellhousing separator plate, which we sourced from Summit Racing (PN SUM-700600). This unit works on both the 157- and the 164-tooth ring gears and is required to properly space out the transmission.

Next, an SFI-approved flexplate from Speedway Motors (PN 57530202) is installed, torqued to spec using the provided fasteners and blue Loctite.

On the transmission side, the Gearstar AOD is prepped by ensuring the 2,600 stall converter is fully seated on the input shaft before the engine and trans are mated together.

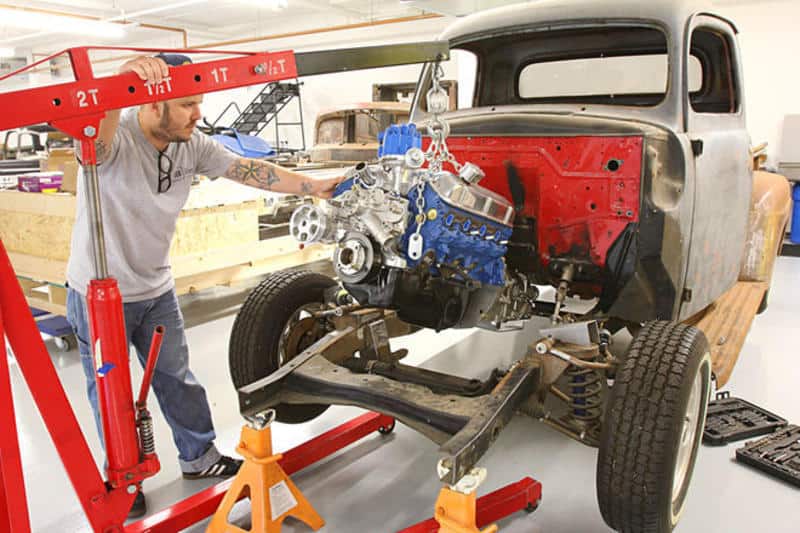
With everything bolted together, the assembly can be swung into place between the F-1’s framerails.

When it comes to engine placement, there are a couple factors to consider, such as oil pan
![]()
… and firewall clearance. Typical engine placement is a careful balance between the two, with the end goal being an engine with plenty of ground clearance at ride height as well as room for the radiator/fan and steering components. Thankfully, our F-1 had plenty of space to accommodate our small-block.
With the engine and transmission assembly between the framerails, it’s time to finalize their location. We began this process by setting the truck on jackstands with the frame at the same rake as it sits at ride height. This makes it easy and guess-free when it comes to setting the transmission output shaft’s pinion angle, which can be determined using an angle finder mounted on the crankshaft balancer or pulley. For most installations, a pinion-down angle between 3-6 degrees is all it takes.

Next, the engine is centered between the framerails. A 1×4 piece of wood works great to shim the oil pan between the crossmember, maintaining the desired clearance as well as supporting some of the weight so that the engine doesn’t swing freely on the engine hoist and stays in place once centered.

Next, the Speedway Motors weld-in motor mounts (PN 91018045) are bolted to the block and a preliminary check for fitment of the weld-on tabs is made. The tabs will need to be trimmed to fit, which is accomplished by setting the tab against the engine mount and determining the amount of “overhang.”

A quick trip to the bandsaw and a few tacks from our Miller Diversion 180 TIG welder does the trick and our engine is securely in place. Once the chassis is stripped bare, we’ll go back and fully weld the mounting tabs in place, unimpeded.

To support the transmission, we’ll be using a Total Cost Involved bolt-in transmission crossmember.

With the engine in place, it looks like we’re going to need to install three U-joints to get our steering linkage to clear the headers and engine mount. We’ll start at the rack-and-pinion and work our way up to the column, cutting our DD shaft to fit.
![]()
Once clear of the engine mount, it’s time to change direction and pitch the linkage up toward the column. Note that the DD shaft doesn’t extend into the U-joint knuckle.

The DD shafts are held to the U-joints using a pinch bolt and locking nut arrangement. To prevent the pinch bolts from slipping on the shafts, a small dimple is drilled into the shaft where the pinch bolts engage.

A three U-joint linkage system requires a support bearing to prevent the linkage from binding. We chose to mount the bearing on a bracket that will be welded to the top of the framerail.

With our engine in place, you can see that the first cylinder is in line with the axle centerline, a decent baseline for optimum engine weight bias.


Time to turn our attention to the exhaust and fuel system!
Ready to experience top-notch transmission solutions and expert support?