by: Terry Mcgean
The trappings of modern technology can spoil even hardcore authenticity buffs. Sample something new, and before you know it, you can’t do without it. It happened to us. After years of driving late-model machines for most of our long distance jaunts, we’ve gotten used to low rpm cruising. So when we hop into one of the classics, even one without drag strip-oriented gearing, the constant engine speed feels uncomfortable, like it’s beating itself up for no good reason. Fuel consumption is worse the we remember, too.
Most recently, our in-house ’67 Camaro has come under scrutiny. With its mild 327 and factory Powerglide two-speed trans, it was plenty reliable, but still left a bit to be desired. The ‘Glide does it s job surprisingly well considering the lack of ratio options, but the compromise becomes apparent when you want to do more than just putter around town. Off-the-line acceleration is hindered a bit by the 1.76:1 "low" gear, and highway cruising keeps the engine around 3,000 rpm all the time. And it sucks down fuel like something that should be much faster.
We’d been considering an overdrive transmission swap for a couple of years, but wanted to be sure the car could be converted without any permanent modifications, and we also wanted the car to look stock afterwards. The choices for overdrive automatics for Chevy, at least the ones that don’t require a computer, boil down to the 700-R4 and the 200-4R. Both transmissions are four speeds and both were introduced to the GM arsenal in the early ’80s. The 200-4R was actually first, seeing use in some 1981 models, primarily full size Olds and Buick models with the Olds 307 V-8. The 700-R4 debuted the following year and was used almost exclusively behind Chevrolet engines.
Perhaps because the 700 was used in performance applications, including the Corvette and Camaro Z/28, it is seen as a more performance oriented transmission than the 200-4R. It didn’t help that early versions of the 200-4R were also prone to failure, primarily because this transmission had been designed with reduced internal rotating mass to help boost fuel economy. Over the years of its production, the 200-4R was fortified with improved internals, peaking with the versions used in Buick Grand Nationals and the ’89 Turbo Trans Am.
The 200-4R does hold some advantages, however. For one, it ha a "multi-case" bellhousing, meaning it can accommodate both Chevy and Buick-Olds-Pontiac (B-O-P) engines. It’s also more compact, having the same overall length as a Powerglide or TH350, and even using the same output spline. The 700-R4 also uses the same output spline as a "Glide or TH350, but is longer overall, requiring a shortened driveshaft.
The 200-4R also has tighter gear spacing, starting with its more V-8 friendly 2.74:1 first gear ratio, as opposed to the 700’s 3.06:1 first gear, which is a bit low and creates a wide gap in ratios between first and second. Some transmission experts also feel the 200-4R has a superior power flow path, and that it just needs to be fortified to handle more power.
Although the 700-R4 can also be strengthened, and does make a good swap candidate for older Gm cars, the 200-4R appealed to us more, since it seemed that it would be an easier swap for the early Camaro. Then we talked to the guys at Gear Star Performance Transmissions and found that they build 200-4Rs to handle over 1,000hp, so we figured our street cruiser Camaro would be no problem.
We were also pleased to find that Gear Star actually offers the 200-4R in a few different levels, so customers with mild combinations in street cars like ours don’t have to endure the antics of a race-dedicated transmission. The level 11 package is intended for street cars with less than 400hp and 350-lbs.ft. at the wheels: Level 111 is spec’ed for occasional strip use and over 400hp and 450-lbs.ft. while level 1V is good for over 500hp and 500-lbs.ft. Custom applications can be built to handle even more power.
We selected a Level 11 package, which includes a new lockup torque converter and, like the transmission, the converter is intended for street use, so it maintains the stock 12-inch diameter and is built to provide 1,800-2,200 stall speed, depending on the engine’s torque output. Our 327 will likely stall on the low side, which should work great for this car, for right now.
We’re going to cover this swap in two parts, starting with an overview of the transmission itself and what is done to make it more durable, plus some basics on the swap and how to make the new transmission function like GM put it there.
 |
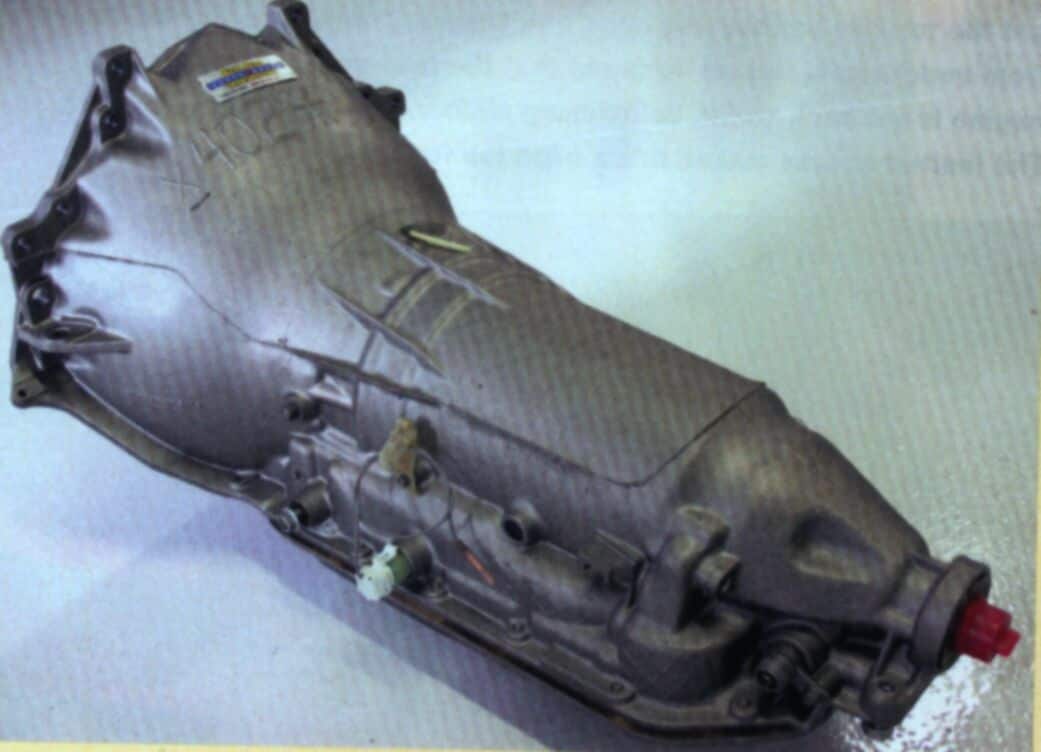
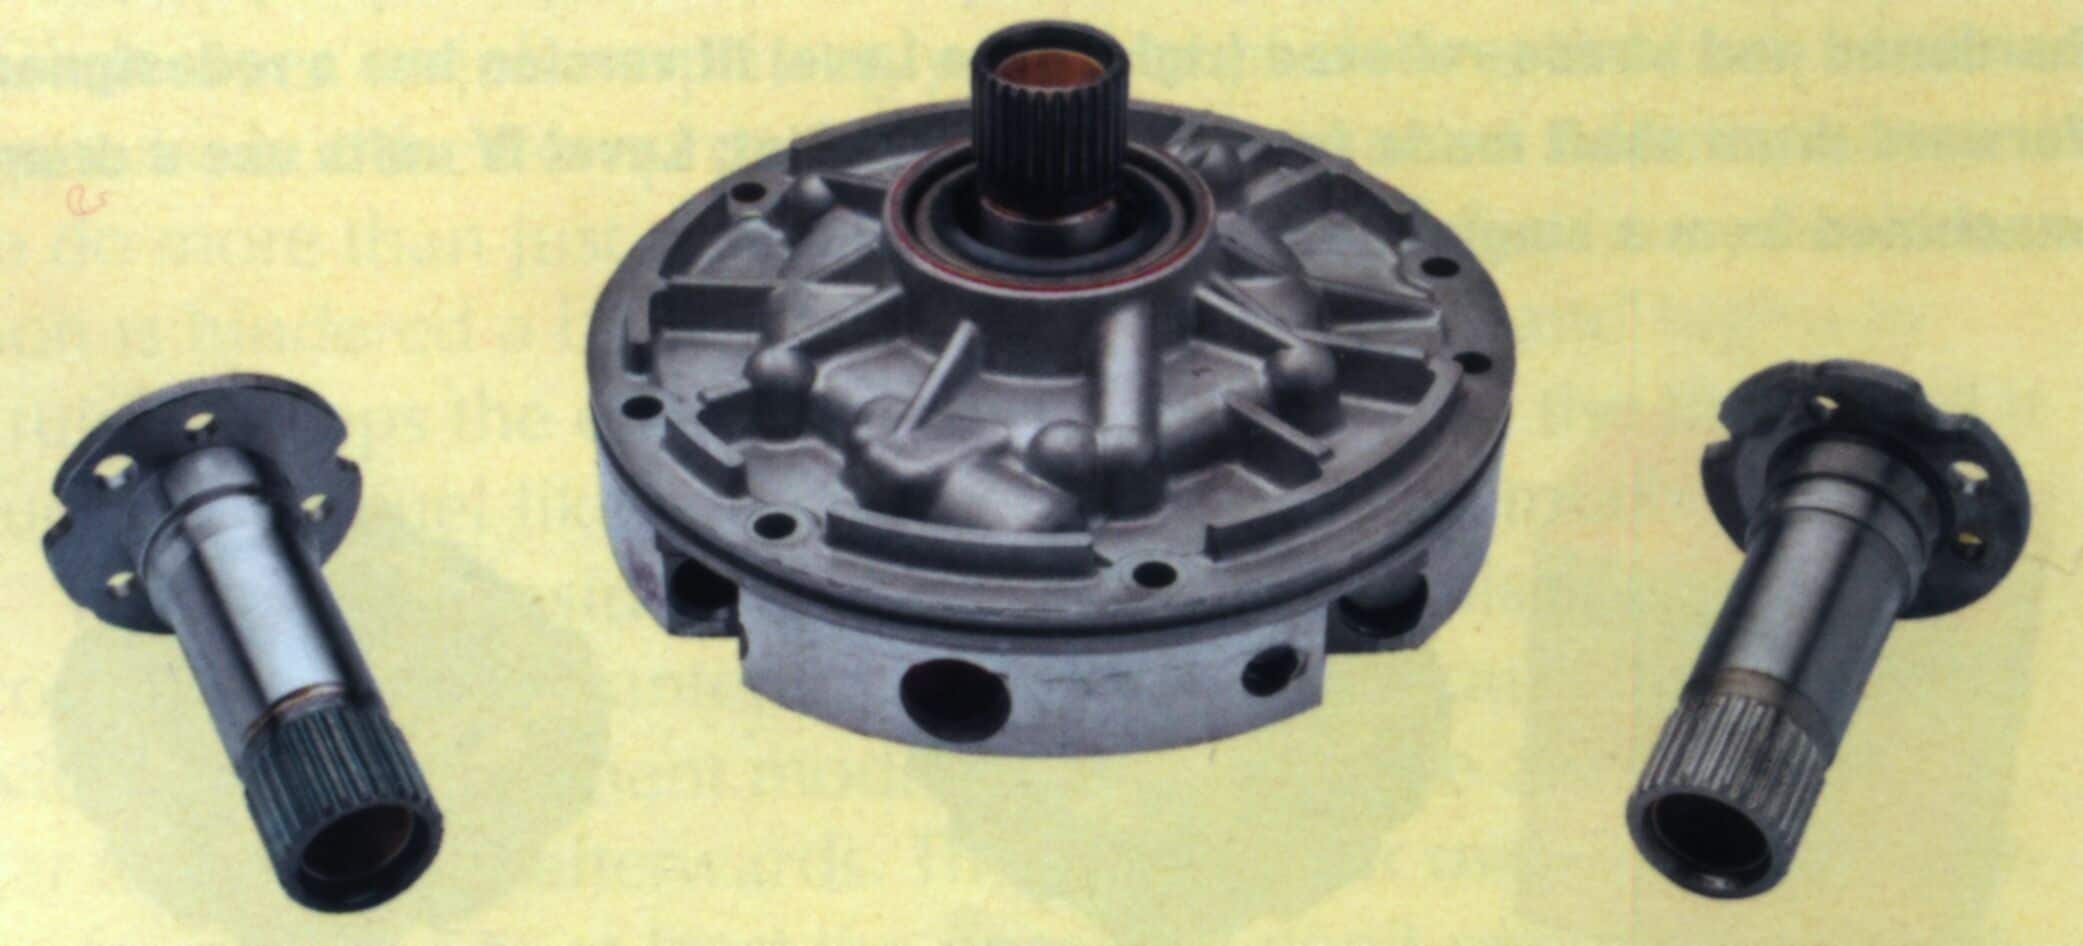
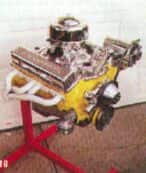
This swap could be preformed with a used trans procured from a parts car or junkyard, but we saw two potential trouble areas with that plan: For one thing, you never really know what you’ve got with a used automatic until you can drive it, and two, even the best stock 200-4R isn’t terribly strong. Instead, we opted to contact Gear Star for one of its rebuilt and improved 200-4R transmissions. It showed up packed neatly in a crate with the torque converter held in place with a retainer and even a pan full of fluid. |
|
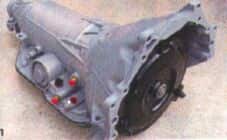
The 200-4R debuted for the 1981 model year and was intended as a relatively compact overdrive trans with reduced internal rotating mass to improve fuel economy of low-output V-8s in passenger cars. Reduced internal mass generally means reduced durability, and though GM made improvements over the run, there were still weak points. We opted to go with a 200-4R since we felt it would be easier to swap. Gear Star also assured us they could build one that would handle our 327’s output, plus the increased output we may have later. |
 |
 |
One of the weaknesses of the 200-4R is the input shaft, so for its Level 11 200, Gear Star uses a new input shaft that has been hardened and stress-relieved, which they tell us makes it 50 percent stronger than stock. A similarly hardened and stress relieved overdrive planet set and ring gear are also used in Level11 units (left). For Level 111 versions, a 300-M steel billet shaft rated for 1,000-lbs.ft. is used: Level 1V "Signature Series" units get a 300-M billet shaft that is upgraded to 30 splines rather than the stock 27-spline count (requiring a custom torque converter) for a 1,200-lbs.ft. rating. The Level 1V units also use an upgraded billet steel-spline-hub in the O.D. planet, replacing the factory cast-iron hub. |
|
According to the Gear Star techs, the forward drum and center support are probably the weakest links in the 200-4R. In our Level 11 unit, both are hardened and stress-relieved (right). The Level 111 version has a redesigned forward drum shaft made from 300M steel billet: Level 1V units use a drum machined from a single piece of billet aluminum. |
 |
 |
The 200-4R has been out of production since the early ’90’s, so some of its parts are now getting harder to source. In anticipation of this, Gear Star has stockpiled certain AC Delco Hydra-Matic parts that are getting scarce. For example, the forward planetary set is no longer made by GM. But Gear Star has about 800 of them in stock. For Level 11 transmissions like ours, the stock piece is hardened and stress-relieved. |
|
Among the primary wear items in a typical automatic transmission are the clutch plates. This is also an area ripe for improvement, which is accomplished by increasing the durability of each clutch plate in a pack and by increasing the number of plates (and corresponding friction steels) in each pack. The Level 11 200-4R uses Gear Star’s high energy clutches and hardened steels (upper right): Level 111 and 1V units use Red Eagle racing clutch plates and colene steels (left top and bottom). In the direct drum, Gear Star usually increases the number of clutch plates from six to eight. |
 |
 |
The intermediate band and its servo are common upgrade areas for 200-4R: even the factory upgraded these pieces for Turbo Regal applications. Seen here on the right is a stock band, servo piston and anchor pin. On the left is Gear Star’s extra-wide band (40 percent wider), made from carbon fiber-lined Kevlar. The piece is manufactured by Alto Products for Gear Star in a collaborative effort between Gear Star’s Zach Farah and Pete Santiago from Alto’s High Performance division. Level 11 units also use a Super Servo, which has 24 percent more apply area than GM’s Turbo Regal servo; Level 111 and 1V use a different billet servo with 70 percent more surface area than a Turbo Regal unit. Both use Gear Star’s billet steel anchor pin. |
|
All Gear Star 200-4R get a new AC Delco pump; Level 11 uses Gear Star’s own hardened stress-relieved stator shaft (left) and a new AC Delco slide and rotor and new boost valves. Level 111 and 1V versions get a billet steel stator shaft and a billet slide and rotor and larger billet boost valves. Other internal upgrades to our Level 11 unit include a hardened and stress-relieved output shaft and output ring gear, low clutch housing, and rear planetary set, which also gets an upgraded low gear sprag. |
 |
 |
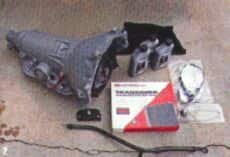
Our Gear Star transmission came complete with a new Yank Racing torque converter, which will retain the lockup feature that factory 200-4Rs use. One of the things we liked about dealing with Gear Star is the staff’s understanding that not everything is a race car. Our Camaro is a cruiser that may see what we’ll call occasional recreational drag racing. Otherwise, it will be street driven, so we didn’t want a sloppy 10-inch converter like many performance transmission builders push. Gear Star set us up with one of its Yank 12-inch units built to deliver up to 2,200 rpm stall-more than stock but still conservative. |
|
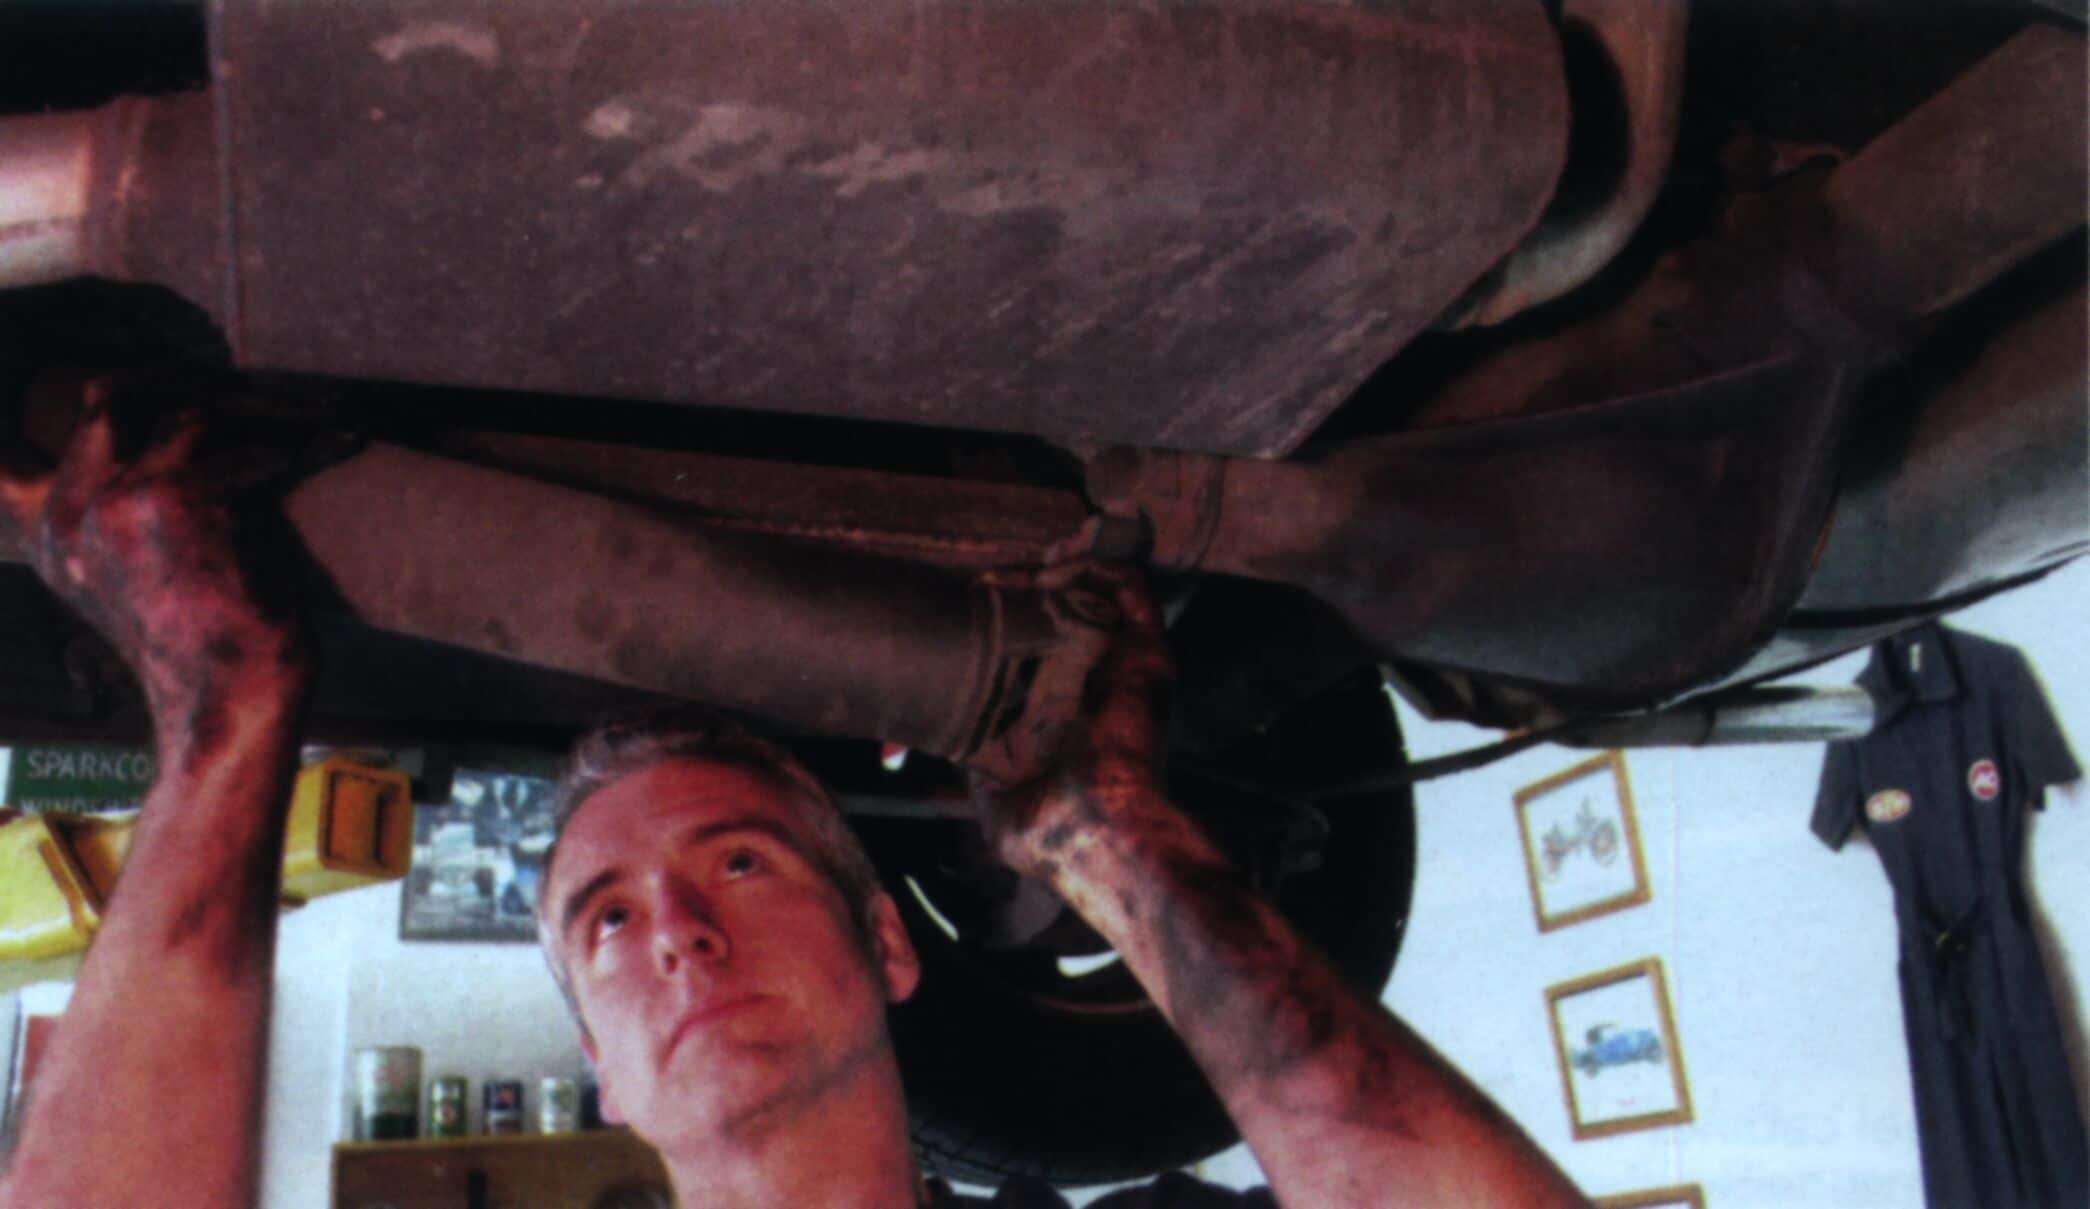
SWAP Procedure: The trans swap starts under the hood. After disconnecting the battery, Hemmings Motor News Editor Mike McNessor dives behind the engine to get the top two bellhousing bolts out. On many cars, this may be easier from underneath, but we’ve found that the first-generation Camaro’s engine is set back so far, bellhousing clearance is absolutely minimal. The limited access makes this a good job for a ratcheting wrench. |
 |
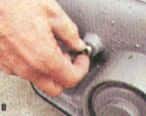 |
With the car in the air, the lower bellhousing bolts are fairly easy to remove; then it’s on to the torque converter. The shield has to come off first (if your car still has one)’ followed by the starter. Then the three torque converter bolts can be removed. On earlier GM automatics like this, there are nuts and bolts fastening the converter. The engine will have to be turned after each bolt is removed to bring the next one into view. After they’re all out, pull the converter back away from the flexplate. |
|
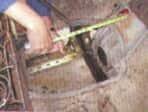
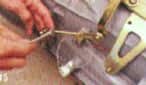
The driveshaft should come out now, but be prepared for fluid to come out of the transmission tail when you pull the slip yoke out. It’s handy to have a spare yoke around to use as a plug, but since we didn’t have one, we used the plastic plug from our new trans. Be careful with the universal joints when you remove the shaft, as the cups can drop off, spilling their needle bearings. It’s a good idea to wrap some tape around the joints while they’re out of the car. |
 |
 |
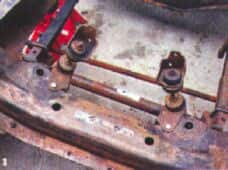
The transmission crossmember must be removed to get the transmission out, but since it sits on top of the frame, the bolts can be removed before supporting the transmission. There are nuts and bolts at the frame rails, and then two bolts that thread into the transmission mount. Although it may seem necessary, remove the other two bolts that fasten the mount to the transmission case, as you’ll need all the room you can make to wrestle the crossmember out of the car. After supporting the transmission, push one side of the crossmemeber forward and the other side back. A little hammer persuasion will likely be required. |
|
Removing ancillary items like the speedo cable and the transmission cooler lines may be easier after the crossmemeber is out, so the transmission can be lowered slightly to gain more access. The speedo cable has a threaded collar that holds it on -if you’re removing it from a TH350, there will probably be a smaller "stepper" box between the cable and the trans- hang onto it; it’s used to effectively lower the speedo drive connection, which is a problem on early F-cars since the trans tunnel is so deep. |
 |
 |
The transmission cooler lines, especially on a TH350, are tough to reach with a wrench without lowering the trans a bit. We got ours out of the Powerglide with basic open-end wrenches, but there’s always a danger of rounding a fitting that way. Using a flare-nut wrench is the right way, but difficult with limited access. |
|
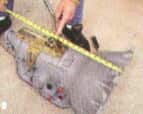
With the powerglide out of the Camaro, we lined it up with the 200-4R to illustrate that the overall length of both units is the same, as is the output spline count- that means we can retain our factory driveshaft. The main difference lies with the transmission mount location, which is in just about the same position on the 200-4R as a TH400. In theory, this would mean that a TH400 crossmember would work for the swap, though it’s a theory we wound up disproving. |
 |
This job would be a lot easier with a "stand-up" transmission jack, but we didn’t have one. No matter- we rented a floor type trans jack and raised the 200-4R into place. It mated right up to the back of our 327 without a fight. Before you put the transmission in place, be absolutely sure the torque converter id fully seated.
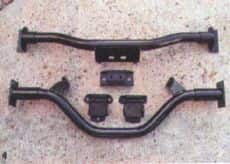
ATH400 crossmember for early Camaros may not be a common swap meet item anymore, since it was only used with bog-block applications, but reproductions are readily available. We picked one up from Ground Up in Meriden, Connecticut, for about $70. The different crossmemeber is necessary since mounting pads on the subframe rails don’t extend far enough back to allow the ‘Glide/TH350 member to slide back to the TH400 mount.
Once we had the TH400 crossmember in place, we quickly ran into a problem: It didn’t line up with the 200-4R. A little more research (that should have been done prior to this point) revealed that the engine in a big-block Camaro is skewed to the passenger side for steering shaft clearance. It’s also moved forward slightly. Both of these facts meant that our small-block placed the trans-mounting pad in the wrong place for this crossmember.
It seemed like it would be fairly simple to cut the mounting pad off the crossmember and reposition it. Mike had it off with an angle grinder in minutes, cutting only the welds. We were going to reuse it, but then he decided to make a new one. Using a piece of scrap C-channel, he made a longer mounting pad and contoured it to fit the tubular crossmember.
Whenever the mounting position of a transmission becomes a variable, you have to consider the effect it will have on the driveshaft’s working angles. We picked up a cheap magnetic angle finder gauge to help determine where our diveshaft angles would wind up with the new crossmember. A general rule is that the working angles of the universal joins should be almost the same, front and rear, and not more than 3-4 degrees. Measurements should be taken with the suspension at a normal ride height.
After we mocked up our modified transmission crossmember, we came across another option. G-Force Performance produces transmission crossmembers to facilitate trans swaps while also providing ample clearance for big-inch dual exhaust. Recently added to its list of offerings is a crossmember for early Camaros with a TH400 on a small-block, which also works for our 200-4R swap. The G-Force piece is extra heavy duty and comes with a powdercoated finish and mounting hardware. Plus, it was the easiest to install, even with the exhaust system in place. It even comes with a shim to correct for driveshaft angle variations. We’re still working on dialing in our working angles, but the transmission is officially installed. Next month, we’ll tackle the details of making it work just as if GM had installed it.
PROFILE; GEAR STAR
Once we’d decided to go with an override automatic, and to get a rebuilt unit rather than the junkyard scavenging we’d been tempted to try, we needed to find a source. The choice of a 200-4R had already been made, and we really didn’t want someone talking us into a 700-R4 just because that’s what they had; we also didn’t want to be talked into a full-race bang/screech ‘box with a sloppy 10 inch converter set to stall at 2,800 or higher. This car is a street machine, and we just needed an improved version of the factory 200-4R.
Gear Star seemed to understand why we weren’t interested in the top-of the-line version for this car. We also found that they build their own transmissions under one roof, with a single technician building one unit at a time, rather than utilizing an assembly line process.
Gear Star also swears that every transmission it builds is bolted to the in-house dyno and checked for proper operation while shift points and line pressures are dialed in, This is why they hounded us for information on rearend ratio and tire size for our car. They’ll even set up the speedometer drive to be accurate for your car if you’d like.
Ready to experience top-notch transmission solutions and expert support?