The highs and lows that accompany building a project car can seem never-ending. It’s a virtual roller coaster ride of aggravating let downs and animated high-fives (with anyone within arms length). But even after a month of molasses-paced progress, once the plugs ignite the stagnant fuel for the first time, all the sleepless nights and bloodied knuckles instantly become a distant memory. As a cylinder-full of spent vapors get released through the open garage door, so do the cynical thoughts of never being able to get this thing off the ground.
During the relatively short time our second-gen project car, a 1971 Camaro known as Project Orange Krate, has been on our possession, we’ve gone through a few highs and lows ourselves: the first high was loading up our car on the trailer and taking it home. The first low: the long period of time the car sat once we got it home. Next high: firing up the engine on the dyno and squeezing out nearly 500 horsepower. The next low: waiting over two months to get our potent small-block installed in the car.
Knowing our project car will one day possess tons of great products from our advertisers-everything from suspension, brakes, tires, gauges and interior pieces-making big decisions on which parts will work best together can be a bit daunting, but it’s all part of the challenge.
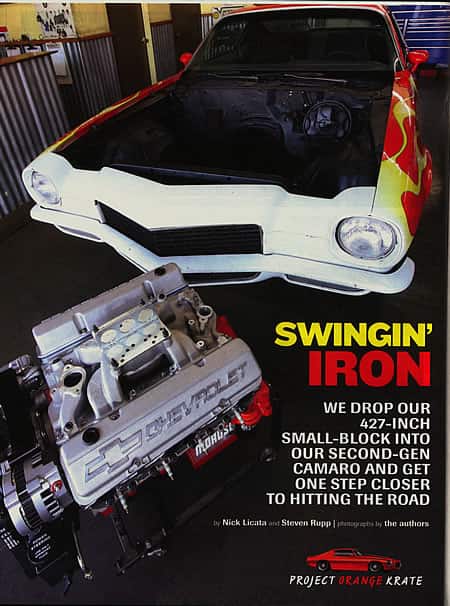
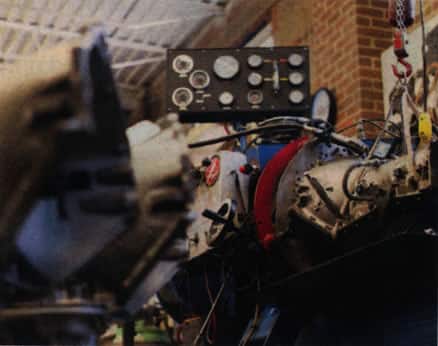
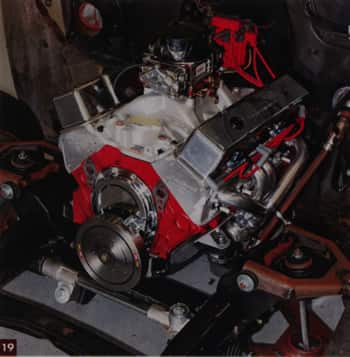
After spending hours on the phone wrangling up the necessary parts, our project inevitably got pushed to the side by other time-consuming magazine deadlines and a brutal summer travel schedule. That left us with little time for getting our bitchen parts assembled and installed on the car. I know, it sounds a bit whiney, but if you were greeted five-days-a-week by a set of 18-inch Fikse wheels (still in boxes) sitting in your office for over two months, you’d be a little cranky too. Not to mention having to watch the car accumulate a uniform layer of parasitic dust for weeks on end. Well, it’s been a couple of months since our portly small-block made noise on the engine dyno-fortunately we were able to make time to bring the car, engine, and a freshly-built Gear Star TH 350 transmission over to Don Lee Auto in Cucamonga, California, where Tim Lee and the boys placed tab A into slot A. With 427 cubic-inches of meticulously formed and milled iron, symphonic melodies finally echoed from the confines of its new home, the engine bay. This was definitely one of those highs I referred to earlier.
Project Orange Krate now has a heartbeat. And what a heartbeat it is. Once the World Products 427 fired up, the car came to life, and the excitement of building a project car started all over again. Follow along as we show you how we put together a bunch of cool parts that work in unison to make one badass second-gen Camaro. Although we still have a few tweaks to tackle, thanks to some of Camaro Performers magazines’ advertisers and a few knowledgeable car guys, the ’71 finally moves on its own power (man does it have power!).
 |
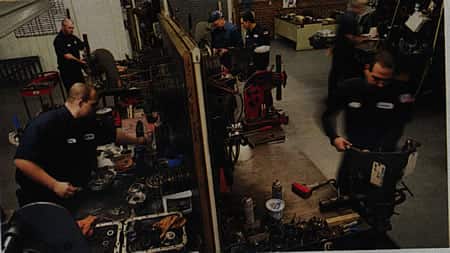
To get the engine into place and fired up we enlisted the help of Tim Lee at Don Lee Auto in Rancho Cucamonga, CA. He has a lift that makes life easier, and more tools than Jeff Spicoli’s old man. Compared to other cars, the second-gen’s engine bay is pretty roomy so the small-block slid in easy. |
|
Headers that actually fit make dropping in an engine much easier. These tubes were bent up by Doug’s Headers and are specific for second-gen Camaros. Doug’s has been doing headers since 1958 and these hand-built, mandrel-bent tubes are a work of art. This set features 1-5/8-inch primaries and 3-inch collectors; they are tuned with the proper size and length to efficiently remove all the spent gases from each cylinder. This reduces pumping loss and the result is more power and torque. The ceramic coating is for more than just looks. It can lower engine bay temps drastically, which equates to more power. |
 |
 |
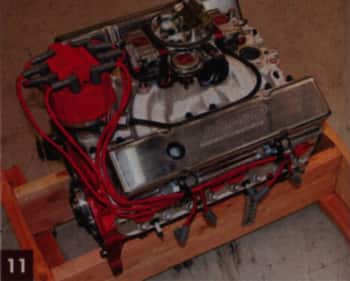
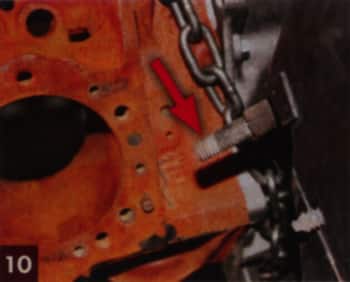
Our 427 isn’t super high-compression, but it does take a bit to get it spun over. To make sure it starts every time we turn the key, we went with this high-torque starter from CVR. Their Protorque Maximum starters have an aluminum housing to help eliminate hot-start problems and are completely sealed from the elements. They also feature five adjustment positions for clearing headers and oil pans. |
|
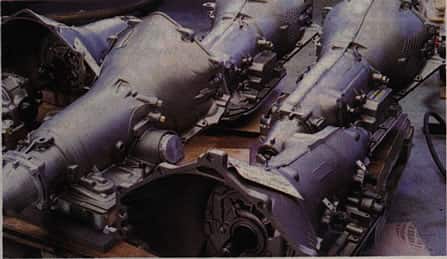
The Gear Star TH350 trans came ready to install with fluid and all. We just had to assemble the kick-down cable and supplied fill tube and dipstick. |
 |
 |
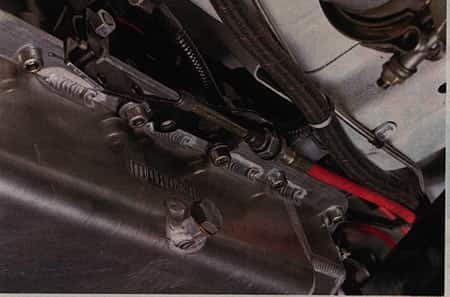
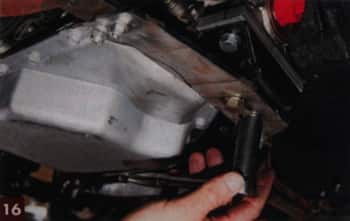
The headers were installed from the bottom and secured with ARP fasteners. Once cinched down, we re-installed our plugs. We’re also happy to report that the headers fit without any drama. Nothing’s worse than taking a hammer to a brand new set of headers. |
|
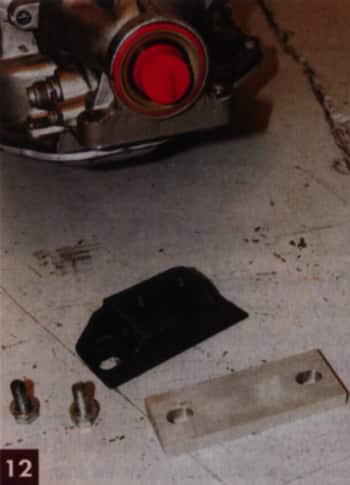
With the starter in place we could then install the flywheel sent with our new Gear Star TH350 transmission. For bolts we went with a set from ARP. They only cost a few bucks and we’ll never have to worry about them failing. |
 |
 |
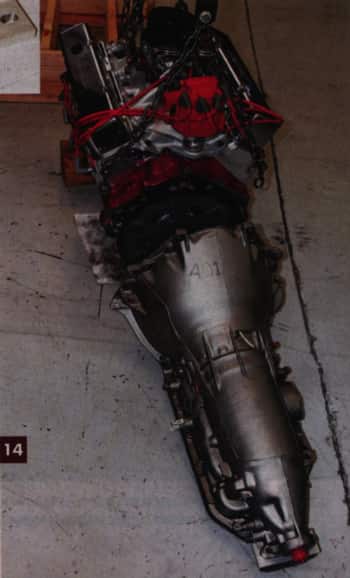
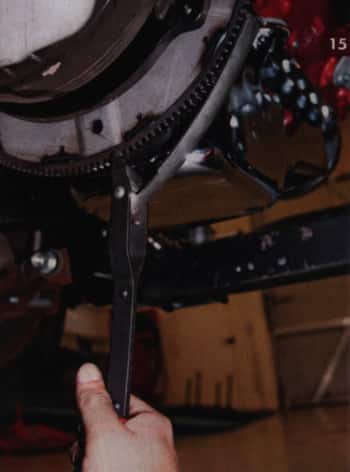
Complete with a 2600 stall converter, we lifted the trans into position and bolted it to he 427 small-block. Gear Star was also nice enough to send us a polished aluminum cover and everything fit just like it was supposed to with no massaging or cutting required. |
|
We want our project car to look good as well as perform, so we took it up a notch with this billet stainless water neck from Performance Stainless. Besides being drop-dead-gorgeous it has the added benefit of being able to rotate 360-degrees. |
 |
 |
We marked and removed the MSD distributor to make stuffing the engine into the bay easier. Once back in the block we secured it using a billet hold down from CVR. |
|
The loom from AAW really is plug-and-play. We simply plugged in the two looms and then ran them to the appropriate spots in the engine bay. All of the wires were labeled, so when we hit the headlight switch, our headlights, not the windshield wipers, came on. |
 |
 |
Our MSD Pro-Billet distributor requires a control box so we opted for their 6AL model. Once mounted to the firewall we wired the 6AL to 12-volts and plugged it into the distributor. One big benefit of a box like this is that we’ll be able to set up a rev-limit point so we don’t accidentally scatter our new mill across the tarmac if we miss a shift. |
|
The wiring in our Camaro’s engine bay was shot. Decades of people cutting, splicing, and generally hacking stuff up made it way beyond repair. Luckily the folks over at American Auto Wire (AAW) make factory replacement looms. These came ready to go and we ordered ours specifically configured to work with the Vintage Air Front Runner, which has the alternator on the opposite side as stock. |
 |
 |
Holley’s new billet aluminum fuel log is fully adjustable from 9.250 inches to 11.250-inches. It comes with an 8-AN inlet and port for a fuel pressure gauge. As a side bonus it looks pretty good. |
|
We then installed the Be Cool water temperature sending unit into the Weiand intake manifold. The oil pressure sender was mounted to a port down by the filter. Firing up the engine without a functional set of gauges was not even an option. |
 |
 |
To finish up the fuel system we went over to G&J Aircraft in Ontario, CA. They were able to build us a set of custom-length AN-equipped lines while we waited. Their prices were great and it sure beat having to wait for parts to be shipped. You have to love instant gratification! |
|
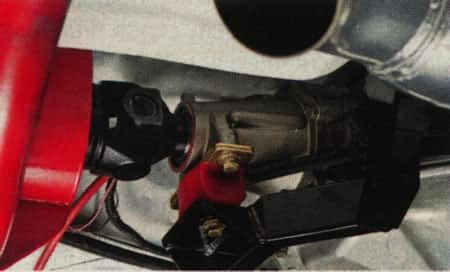
Another item that needed plumbing was our power steering system. We bought the lines from Detroit Speed and Engineering and then cut them down for a custom fit. Their kit also included the necessary fittings to equip our box with AN fittings. |
 |
 |
For sparking up our gas we went with this MSD Blaster 2 coil and a set of their 8.5mm Super Conductor wires. We forgot about needing a coil mount, but a quick trip to Autozone solved that problem. |
|
With the coil and plug wires installed we could then hook up the Holley throttle bracket and attach the cable from the Gear Star TH350 transmission. |
 |
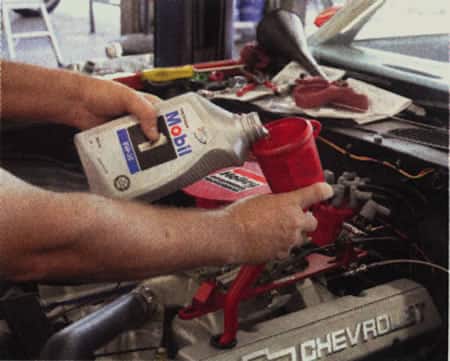 |
After running our engine on the dyno we drained the oil and replaced the filter. To keep all the internals running smooth we opted to pour in Mobil 1 5W-30 oil. |
|
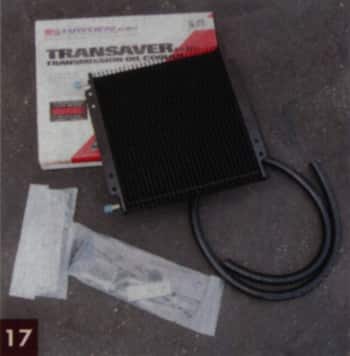
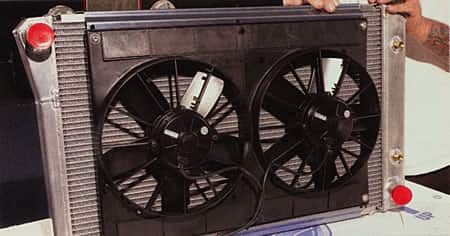
Our 427 is sure to put out a lot of heat. Since we live in perpetually sunny Southern California, two things are guaranteed: stop-and-go traffic and hot weather. To combat these foes of cruising we went with this BeCool 1970-81 Camaro radiator and electric fan setup. The fans are tied to the water temp via the supplied sending unit and also to the air conditioning system. |
 |
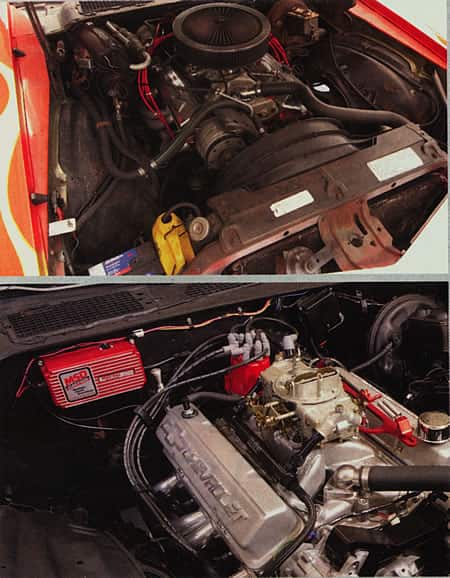 |
How’s this for a before and after shot? The engine bay looks great and is a far cry from the mess we started out with. Twist Machine’s Billet Core Support Bars add some nice flair. If you want to see, and more importantly hear, a video of Project Orange Krate firing up for the first time, then go to You Tube and do a search for "Orange Krate Camaro". It’s almost a shame to install mufflers. |
| GOING LEVEL 3 | |
|
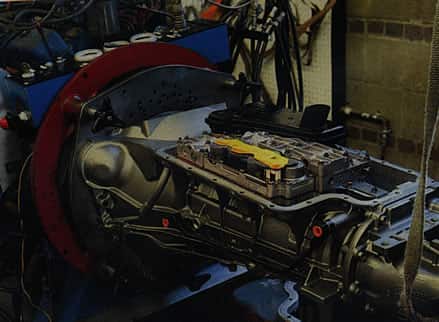
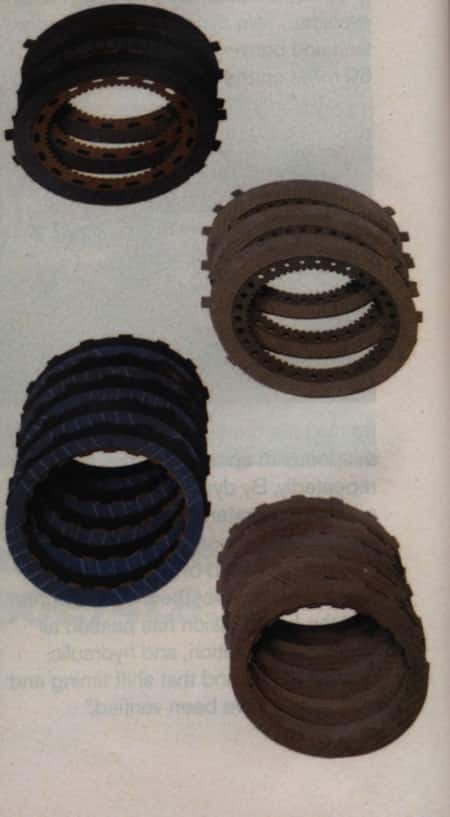
Our 427 puts out quite a bit of torque, so we wanted to make sure we had a transmission that was up to the task. We talked to Zack Farah of Gearstar Performance Transmission in Akron, Ohio, and he steered us towards their Level Three TH350 transmission. They also take pride in their assembly procedure. "At Gearstar, our transmissions are built and dyno-tested by the same master builder from start to finish. The trans and converter are tested as a package equivalent of 100 street-driven miles before it leaves the shop." Remarked Zach. The level three trans is conservatively raed at over 500 hp and features ALTO Redline racing frictions, hardened Kolene steels, high load intermediate sprag, and a TransGo competition reprogramming shift kit. In short, this is the good stuff. Here are a few shots the snapped of our transmission going together. |
|
|
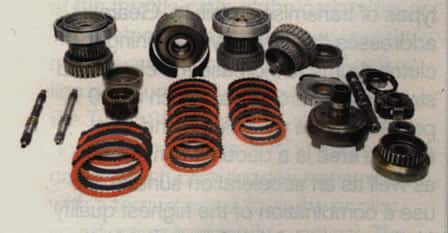
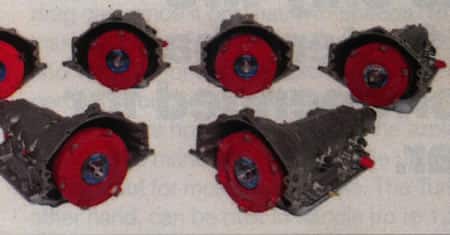
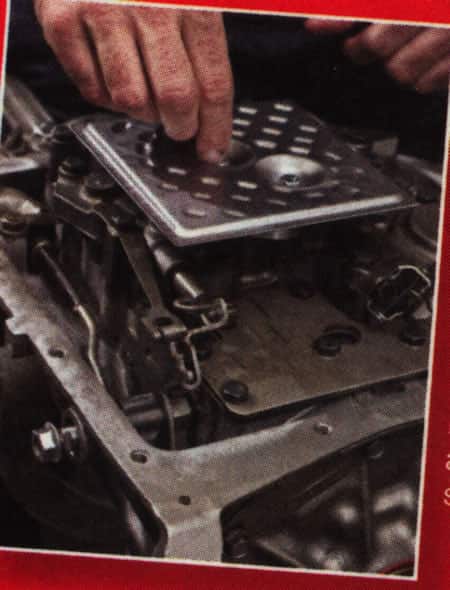
Gear Star’s professional builder installs a high-flow brass element filter onto the custom Billet aluminum filter extension. This way they can accommodate the high-capacity cast aluminum transmission pan. |
 |
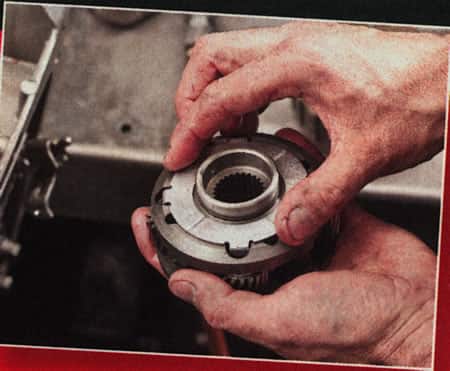 |
Gear Star installs all-new bushings, bearings, and thrust washers. Here they install a new Teflon coated thrust washer onto the cryogenically treated front planetary gear set. |
|
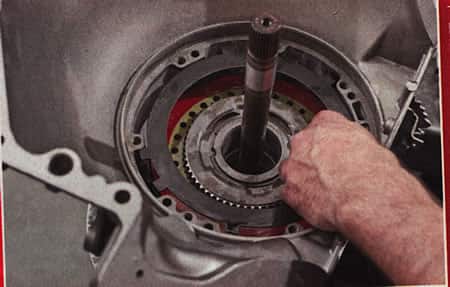
They also use Raybestos Racing stage-1 intermediate frictions and Alto Racing Hardened Kollene steals. This is also where they install the 300 M torsional steel input shaft used in all of their higher-level transmissions. |
 |
Ready to experience top-notch transmission solutions and expert support?