One of the unsung heroes of any build is the transmission. This is mainly because most hot rodders don’t understand the black magic going on inside of them. Too often we just pick up whatever transmission comes along, bolt it in and hope for the best – not fully understanding what combination of hardware would best enhance the drivetrain setup in the vehicle at hand. Most all of us have been guilty of this, but there’s a much smarter alternative – ask the experts. This is just what we did when deciding on how to get the power from the engine to the wheels in this project.
Getting the right answer was as simple as picking up the phone and calling the qualified folks at Gearstar Performance Transmissions. The power for our project was coming from an oddball Chevy 194. They asked all of the important tech specs about the car, even what the intended driving style would be and used their proven formula and experience to come up with the right transmission that would provide optimum performance.
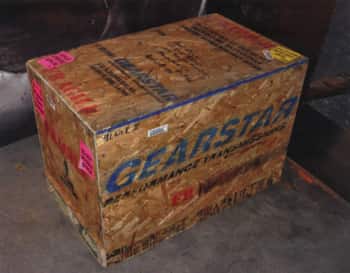
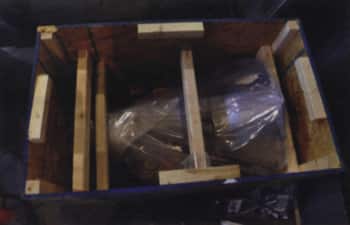
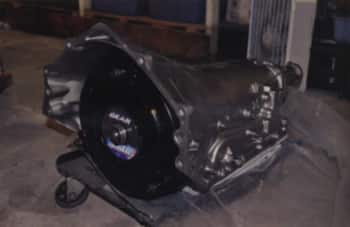
In short order the recommended 4L60E with its custom converter, furnace brazed with flanged hub and carbon fiber clutch, arrived well packed in a sturdy crate. The package was complete with a universal fill tube and dipstick, universal transmission mount, and a special low-profile aluminum converter cover ordered specially for our low clearance application. Due to space restrictions, Gearstar offered us a close-quarters case. The new transmission in the crate was not some stock off-the-shelf unit – Gearstar doesn’t do that – it was built by a qualified technician named Dave, who was with the project from start to finish, even conducting the Dyno testing. Dyno testing every transmission and torque converter package is a critical part of the remanufacturing process. It simulates vehicle load and drag. Gearstar is able to tune quality and timing of the shift, also ensuring the perfect torque converter stall for the application, while checking hydraulic pressures and looking for any leaks or vibrations. Each transmission and converter package is ran the equivalent of 100 miles on the street at peak operating temperature. Because of the testing, the trans comes filled with eight quarts of ATF, please there are even an additional three quarts included in the crate for future use. They literally ship their transmissions ready to install in every way.
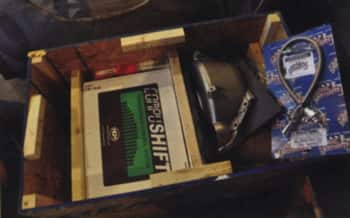
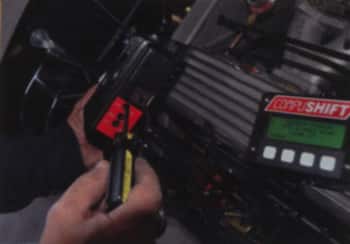
We decided to take advantage of another option offered by Gearstar, the Compushift electronic transmission control system. The programmable unit operates automatic shifting and torque converter clutch lock up for a wide variety of transmissions including our 4L60E. The real beauty of this unit is that you don’t need a PC or laptop to program it. The system is delivered with versatile factory set programming, as well as all the necessary cable harnesses and throttle position sensor. For additional programming capability, we opted for the optional liquid crystal display. This made programming of the transmission’s shift speed and pressure exceedingly simple. You are able to fine tune with the push of a few buttons.
As for the installation, there’s not much to explain, the transmission of course bolted up like any other once we removed it from its protective travel arrangements. The car had previously been fitted with a 700R4 so it was a straight bolt-for-bolt swap to the 4L60E, then the simple addition of the universal fill tube and dipstick. Next we followed the instructions included with the Compushift unit for the installation of the cables so we could then assemble the car.
Once the car was assembled we were ready to complete the installation of the Compushift assembly, which included the Controller and AccuLink Throttle Position Sensor (TPS). We gave consideration to the mounting location of the Controller, keeping it away from extreme shock and vibration, high temperature or high input voltage as well as moisture. Suggested locations were on the floor pan or under a seat with at least one inch of clearance and away from exhaust heat, and not in the engine compartment as to avoid getting the unit wet. We decided on a spot behind the dashboard, which is easily accessed through a removable firewall panel.
The AccuLink TPS is designed to easily mount directly to Edelbrock AFB, Holley and Rochester carburetors and connect through included stainless steel linkage. A cable-operated sensor is also available. The sensor is a spring loaded, fully sealed rotary position potentiometer designed for automotive use. Basically this sensor tells the Controller how heavy your right foot it.
Another neat option available is the Switch-Shift. This feature allows you to manually upshift and downshift the trans via a pair of pushbuttons. With room limited in our project, we didn’t take advantage of this cool item.
Once everything is installed and secure it’s time to calibrate the TPS. This is done by following the few easy steps in the instruction manual once the engine has been warmed up, no longer on fast idle or needing the choke. If there is a problem the easy to follow diagnosis chart lays out the possible issues as reported y the optional LCD display.
At this point you are pretty much ready to drive. We tried out the stock settings by driving around the block, at varying speeds to test the shift points a pressure. Being installed in a hot rod we opted for upping the shift speed and pressure for a more positive response, but options range from almost unnoticeably smooth to chirp-the-tires positive shifting. Adjustments can be made directly on the Controller or via the optional LCD display.
After we got the trans dialed in we started to experiment with the myriad of other cool functions available via the LCD display like the tachometer, transmission temperature, miles per hour, accelerometer and stopwatch to name a few.
With everything adjusted and many miles on the car, the Gearstar transmission exceeded our expectations and has performed flawlessly, just as Zack promised.
|
The battle-ready crate arrived packed with everything needed for a successful installation. Even the appearance of the Gearstar transmission doesn’t disappoint. It looks brand new! |
 |
 |
|
 |
|
 |
|
|
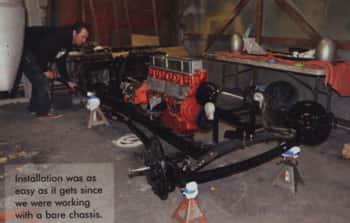
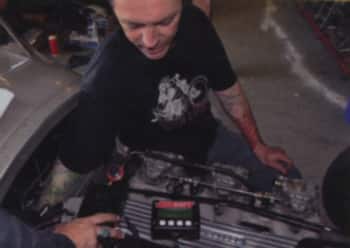
Installation was as easy as it gets since we were working with a bare chassis. |
 |
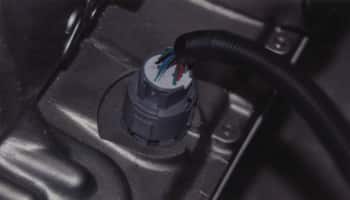 |
The transmission harness install is as easy as plug and play. |
|
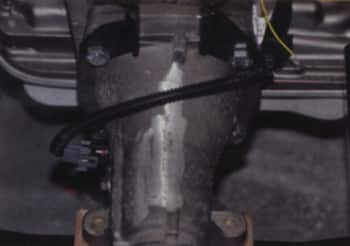
The Speed Sensor is also a simple plug in. your Transmission Shaft Speed Sensor (TOSS) will be on the tail snout for two-wheel drive applications. |
 |
 |
The Throttle Position Sensor (TPS) comes with stainless steel bracketry for several common carburetor types. We had to fabricate a bracket for use on the unique Weber sidedraft setup we were dealing with. |
|
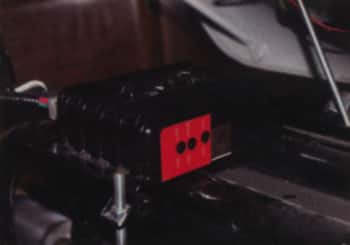
Select a safe location for the Compushift Controller unit; somewhere free from impact, exhaust heat and water. Ours is under the dash. |
 |
 |
Calibrating the TPS is simple and takes less than a minute and is even easier with the aid of the optional LCD display. |
|
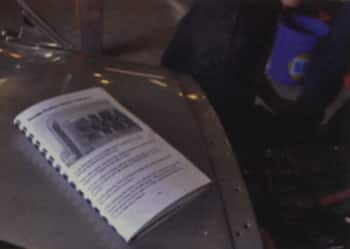
The instruction booklet is clear, concise and covers the complete installation and setup. |
 |
Ready to experience top-notch transmission solutions and expert support?