Some things have been commonplace for too long. Times are changing, an some of it is for the best. There probably aren’t too many people out there faced with the question of having a three- or four-speed automatic in their truck who would opt for three, but again, there might not be too many people who have thought about it.
The 4L60 transmission as been around log enough to prove itself, and it is a shoe-in to replace a Turbo 350 or 400, plus it cam be found in a non-electronic controlled version that’ll work behind a Chevy motor in almost any old truck. Cruising down the freeway while floating the valves keeping up with traffic isn’t much fun, and that fourth gear sure would be nice.
Gear Star is a company that’s been around for over 20 years in the custom-built transmission business, and it is a firm believer in the 4L60 as a workhorse that’ll take a floggin’ and keep on joggin’. The 4L60 also has an electric fourth-gear lockup that totally eliminates any slippage in the torque converter and results in a 30-percent overdrive ratio via the lockup’s mechanical connection to the motor, which will also help the tranny stay cool and lubricated for long periods on the road. All of this is a benefit of a trans that’ll withstand up to 700 horsepower thanks in part to a super-streetable Yank Racing 10-inch converter that behaves like the best 12-inch converter off the line, but can take all the abuse your foot can dish out.
Gear Star transmissions are built to order by one of a few master mechanics with over 20 years under their belt; they don’t have an "off the shelf" package. That same guy tears down, pulls the parts, builds and dyno’s each tranny. Their Level 3 transmissions have many of their own upgraded parts, such as output shafts five times stronger than stock thanks to the 300M hardened steel many of their parts are made from. Once this sucker is in you won’t break it or worry about it. According to Gear Star’s Zack Farah, each comes with a 24-month/24,000-mile warranty to back it up.
Replacing the old TH400 with Gear Star’s Level 3 4L60 in a ’72 Chevy C-10 was basic, but care needs to be taken while adjusting the TV cable to ensure the right change in line pressure inside the tranny to coincide with how much your foot is on the gas pedal. Your driveshaft might have to be shortened lie our was by local shop P.C. Driveline or a new one made depending on the application and if it’s a one-or two-piece unit. We also opted for a new tranny crossmember from Performance Online that makes for more room between the frame-rails thanks to its simple yet effective design.
Your motor, wallet, and ears will thank you in the end. With the lower cruising rpm, just try to keep your hot foot cool.
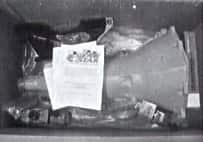 |
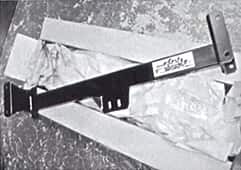
How’s this for goodies on your doorstep? Our Level 3 Yank Racing Gear Star transmission comes complete with a 10-inch lock-up converter, 20K GVW Hayden cooler, tranny mount, dipstick and tube, TV cable, wiring, dust cover, and enough full-synthetic Amsoil ATF to do the job. |
|
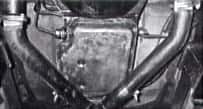
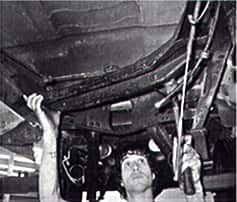
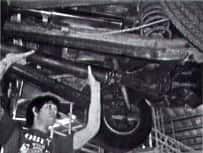
First of all, disconnect the battery and get the truck to a suitable work height so you can access the engine bay and have enough room underneath to pull the tranny. I had the good fortune to use the lift at our tech center for this install. The new MagnaFlow exhaust runs under the pan of the TH400 that’s coming out. this was removed as well as the passenger-side header to easily access the starter. |
 |
 |
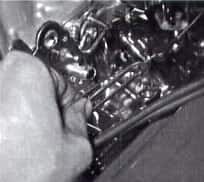
Start disconnecting everything that attaches the trans to the truck and the motor, like the shift linkage at the bell crank on the inside of the frame,while taking note how it came apart since it’ll be used with the Gear Star 4L60. |
|
It’s a dirty job for most daily driven trucks, but someone’s gotta do it, so the dust cover comes off. I can recall very few older vehicles that still retain their dust cover, but after taking this one off it proved their function 100 percent. The exterior of the truck’s drivetrain was pretty nasty, with some decent oil leaks and road grime, but the dust cover kept everything under it quite clean. |
 |
 |
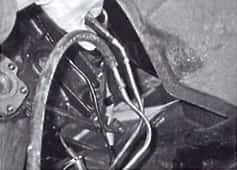
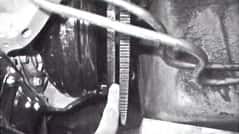
The torque converter is held to the flex plate by three bolts that go in through the front side like so. These need to come out. You should be able to rotate the motor with a socket on the crank bolt to get them down where they can be removed. It’s also a good time to pull the driveshaft. Watch for fluid from the tranny’s tailshaft. |
|
A couple of minutes were well spent dropping the header on the passenger side to give easy access to the starter and have one less thing to bump your head on. Be careful with the starter – it’s heavy – and label the wiring if you need help remembering where it goes. |
 |
 |
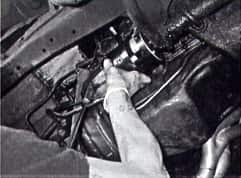
Get our your best set of flare-nut wrenches to loosen the tranny cooler lines. I know I always preach about the importance of good wrenches, but if you’ve ever rounded off a fitting with an open-end wrench, you know what I mean, and if you haven’t, there’s a first time for everything. When the cooler lines are cracked, fluid will leak out, so have a drain pan ready. |
|
Pull the dipstick tube and undo the tranny mount, bellhousing bolts, emergency brake cable, and any other little things like vacuum lines as will as the crossmember bolts so the engine and trans can be jacked up enough to knock the crossmember back to clear the tailshaft when the tranny comes down and out. |
 |
 |
The motor will need to be supported by a floor jack, jackstands, or hoist. I used a heavy-duty car trailer-type ratchet strap and hooked it to each framerail and had it cradle the oil pan with a board in between in case the strap moved. I was going to raise and lower the truck on the lift and needed everything to move together. |
|
With some room to breathe underneath, I commenced with the cleaning and remodeling. A big hammer helped evict the greasy old tranny crossmember. |
 |
 |
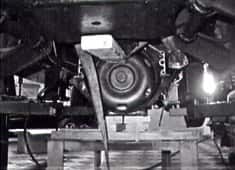
Since the crossmember was going to move forward for the Gear Star 4L60, we used a new one from Performance Online (P.O.L.) that gives more room underneath thanks to its sleeker-than-stock design. It even comes with new hardware. |
|
After the frame was cleaned up i slid the P.O.L. crossmember between the rails, but left it farther back to clear the trans when it is raised back up. |
 |
 |
With a little air, I blew through the old tranny cooler lines since it’ll be using the stock cooler in the radiator until we beef up the motor. On the other line some rubber fuel line was used to direct any leftover fluid into a drain pan versus making a BIG mess – safety first! |
|
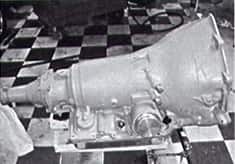
The Gear Star Level 3 4L60 is good to 700hp and has all the benefits of a manual valve body while still letting it run though the gears in drive-it’s the best of both worlds! The Yank 10-inch converter is as streetable as any 12-inch, but it will handle all the use and abuse you can throw at it. |
 |
 |
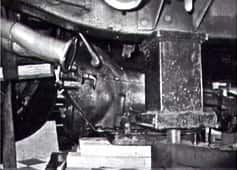
Call the neighbor over if you need a hand getting the new trans back in. You can’t yourself to the hospital with a transmission on your chest. Get the trans lied up on the dowel pins in the block, tighten down the bellhousing holes (except the one that mounts the dipstick tube), slide the tranny crossmember into place under the mount, and take a break. The converter should not interfere with the flex plate and should have a gap around 1/8-inch until you pull the converter to the flex plate and engage the pilot into the crank, which should be cleaned of rust beforehand. |
|
Now it’s time to start hooking everything back up like the speedo cable… |
 |
 |
…and shift linkage. |
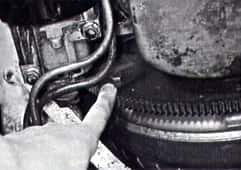
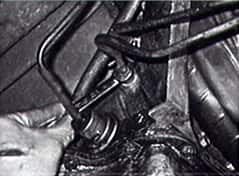
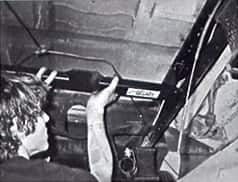
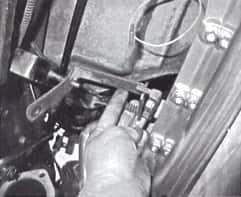
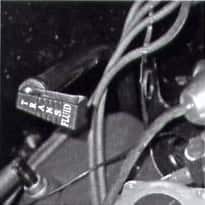
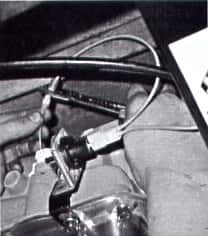
| Here is the new throttle pressure, or TV, cable. This end gets hooked to the little wire bracket in the transmission, in relation to the amount of throttle given; in other words, it’s very important! | 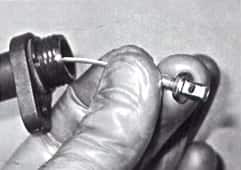 |
 |
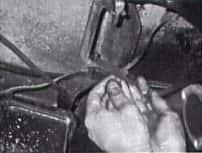
On the passenger side of the tranny we find the little wire bracket to hook the TV cable to. Be careful ’cause it’s tough to hold onto; some needle-nose vise grips might help. |
|
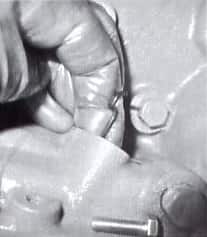
With the situation fairly stable, get out a measuring tape and square up the P.O.L. crossmember before drilling new bolt holes. I measured form the tranny crossmember back to the trailing-arm crossmember for reference. |
 |
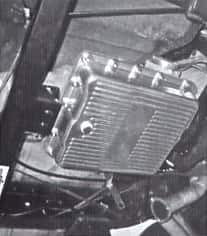 |
The little bit of elbow grease used to clan things up while the tranny was out was well worth it and complements the new four-speed automatic’s snazzy looks. |
|
It might be easier in the beginning to install the dipstick before the trans gets installed. Trying to maneuver it up behind the motor while the trans is raised into place was more than I could do alone, so I just used a little bit of ATF to lube the tranny end oft the tube before pushing it down into place. |
 |
 |
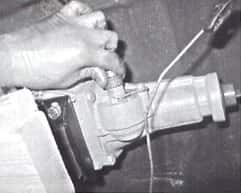
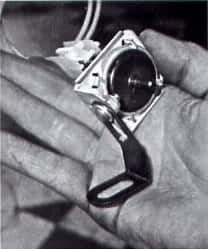
Next up is installing the vacuum switch that will prevent 4th-gear lockup under hard acceleration, wide open throttle, and climbing big hills. |
|
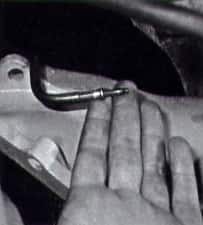
With a couple of strategic tweaks to the hard line that went to the vacuum shift module on the old trans, it was routed to the driver side where the vacuum swill be mounted for ease of wiring and space. |
 |
 |
An extra bracket for the dipstick tube came in handy to mount the vacuum switch once a few kinks were put in place. |
|
The vacuum switch’s wiring is very easy – one wire goes to the plug on the tranny for the electric lockup, an one goes to a power source that urns on with the ignitions. Done. |
 |
 |
You might need one of these if your tranny didn’t have a TV cable before It doubles as a throttle/TV cable bracket and costs about $20 at a local parts house. |
|
The TV has plenty of length adjustability and easily snakes around to the carburetor’s left side to click into the aforementioned bracket. |
 |
 |
The TV cable mounts below the pivot of the throttle linkage on the carburetor like so. Start by pulling the TV cable out all the way, and with the carb at wide open throttle it should pull the TV cable this much. After a road test, if the tranny shifts late and hard, extend the TV cable out 1/8 inch and the opposite if it shifts early and soft.. It’s important to take your time to set this, because the tranny won’t live long with incorrect fluid pressure. |
|
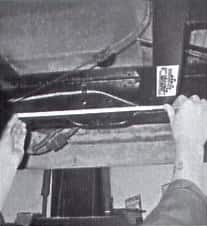
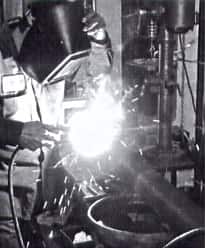
Our neighbors at O.C. Driveline in Placntia, CA, shortened the driveshaft, installed yolk for te 4L60, and pressed in new U-joints lickity split. |
 |
 |
The O.C. Driveline driveshaft went in with ease. Gear Star drains three quarts of ATF out of their trannys before they get shipped. Make sure to add the provided ATF to the tranny before start-up and fine-tuning the TV cable. Enjoy that extra shift! |
Ready to experience top-notch transmission solutions and expert support?