Let me start this story by coming clean and letting you know we didn’t finish the job. With that out of the way, let me explain what we were attempting to do. Our art director for this fine magazine owns this sweet ’63 Nova wagon — with an I-6 and a powerglide — that he has been slowly improving with a variety of projects: suspension, brakes, interior bits, even LED tail lights. But it was really time to put a small-block under the hood and make this grocery getter a legit sleeper project. Nothing computer-controlled or anything like that, just a simple 350 and a 700 transmission. We finally had some time to do the job, so we jumped in feet first and ordered a 290hp CMPP crate before doing any research; I mean how hard could it be to put a V-8 into a Nova? Well let me tell you, it’s not the easiest job to complete, especially in a 5-day window.
Yeah I only scheduled 5 days to do the actual work, gathering and ordering parts was not included. I thought I had gotten everything I needed except for a few small items like radiator hoses and such that I could get at a local parts store, which turned out to be a problem as well. The idea was to do this job using as many mail order parts as possible so everyone across the country could get what we used. Yes, I could have gone to the junkyard and got some of the things needed, but how does that help you?
I talked to our tech center manager, Jason Scudellari, to secure his help and a place in the tech center to do the job. My plan was to drive the car in on Monday and out on Friday. Well that didn’t happen, and not only did I miss my finish date for the car, I ran out of time to complete the job for this story. We did get pretty dang far along considering the issues at hand, but you won’t see us finish the exhaust, set up the transmission, or fire the engine. What we did get accomplished is still valuable and should help you not make the same mistakes I did.
The most important thing you will get from this story, and something I wish I had before starting this project, is a full parts breakdown and the prices. We will also be finishing the job in the June issue of Super Chevy magazine so that story will pick up right where we left off here.
|
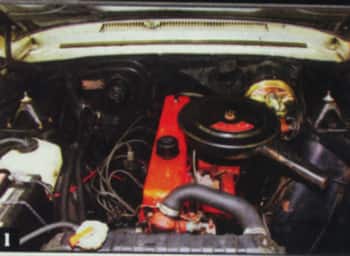
The ’63 Nova wagon we are working on came from the factory with an inline-six and a powerglide transmission. That maybe good for some people but for us this car just deserves a V-8 and an overdrive. |
 |
 |
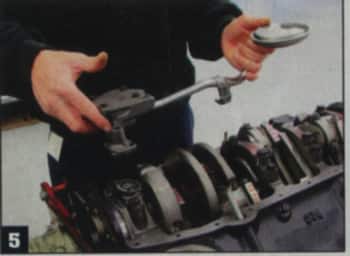
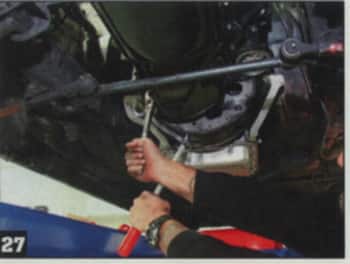
Jason and I got bus and had the motor out in a jiffy. We pulled the motor and trans separately because it was a lot easier than trying to tilt the long inline-six over the core support. The motor and trans can come out as a single unit in one of two ways. One, pull the front clip or two, jack up the front of the car to give the tail shaft room to tilt down to clear the core support. |
|
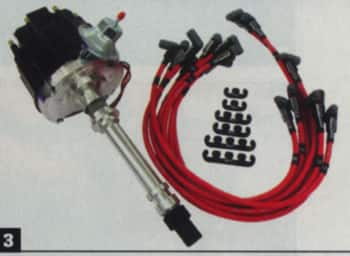
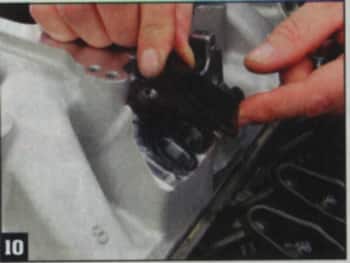
Here is one selection of parts we ordered but didn’t get to install. To simplify the ignition system we ordered a Summit HEI with a compatible gear, Moroso plug wires, and Summit wire separators. We did put the components on the engine just to take the cover shot but pulled them back out to install the engine. We do know the larger body of the HEI does fit with just a small amount of firewall massaging with a hammer. |
 |
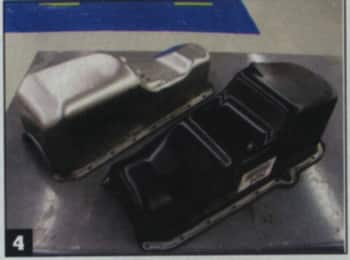 |
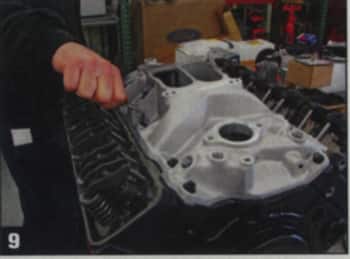
SInce the Nova is a rear steer-configured car the rear sump oil pan that comes on the GMPP motor just won’t work. Here is a side-by-side shot of the stock pan and the front sump pan we got in the conversion kit from Chevy 2 Only. |
|
Also included in the kit is a new oil pump, drive rod, and pick-up tube. All these parts are shorter than stock to fit in the shallower rear area of the new pan. One issue we ran into was the pick-=up tube. It is made to fit a 2-bolt main block and we have a 40bolt. We had to section the bracket on the pick-up tube 1 inch to get it in the proper position for a 4-bolt main cap. Jason also put a tack weld on the pump and the tube to make sure they won’t separate. |
 |
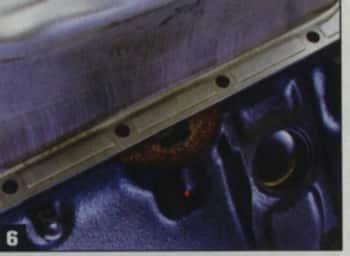 |
Another issue we ran into is the dual dipstick provisions on the GMPP block. The oil pan takes care of the driver side but here on the passenger side it doesn’t have the needed kick out. |
|
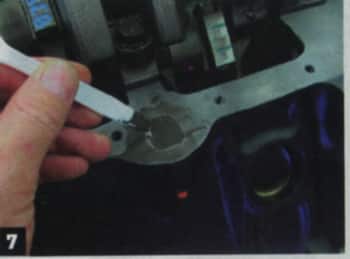
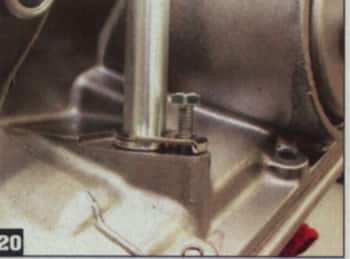
Jason filled the void with JB Weld to give the new pan a place to seal. Once the JB weld dried we installed the pan with the gasket provided with the pan. |
 |
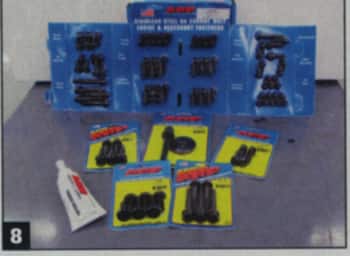 |
Because we don’t have all the hardware necessary to install things like the intake and harmonic balancer we ordered an ARP 12-point black oxide kit and the other needed pieces. You can see the parts side bar for the part numbers we actually used. |
|
The GMPP deluxe engine comes with a low-rise dual plane intake that is a perfect match to the internals of the engine. We used the supplied gasket, some black RTV and the ARP bolts to install it properly. |
 |
 |
The intake has provisions for an EGR and a choke. We will not be using these so we needed to grab the appropriate block off plates and throw them on. |
|
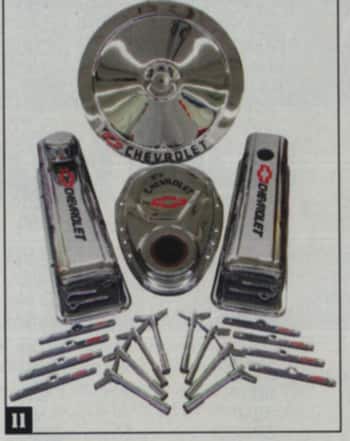
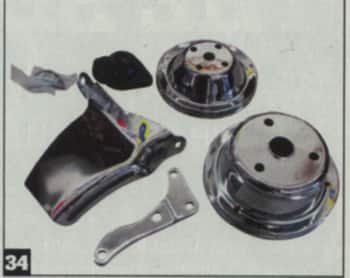
Another cool thing that comes with the deluxe engine package is this chrome dress-up kit. We ended up using just the valve covers, spreaders, and air cleaner for this project. We have a lot of chrome going on this engine and thought the timing chain cover and T-bars would be a bit too much. We’ll save those for a future project. |
 |
 |
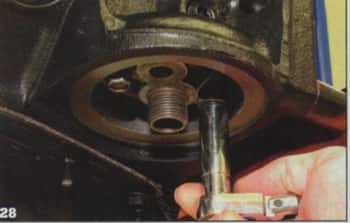
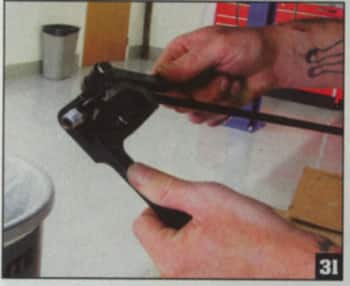
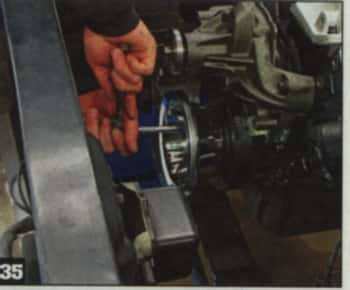
Jason heated the balancer up with a torch for a little bit which helped get it on enough to drag it the rest of the way with the balancer bolt. An installer tool would have been better, but sometimes you got to do what you got to do to get the job done. |
|
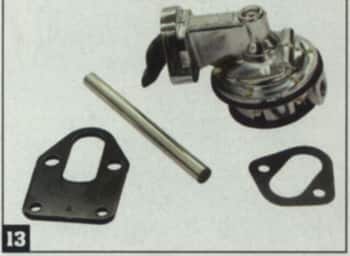
To feed the V-8 we picked up these components from Summit. The one thing we forgot to get was the gasket that goes between the plate and the block. The pump has a rotatable bottom so we can move the fuel line ports. It worked out that way the way it came was perfect. |
 |
 |
Jason greased up the rod before sliding it in the hole which will help hold it in place while installing the plate and then the pump itself all with some of the ARP bolts in the kit. |
|
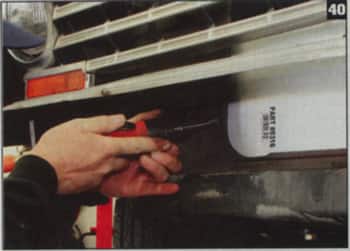
For the motor mounts we looked to Energy Suspension for a set of the company’s urethane units. What makes these so nice is the fact that they have an interlocking design so even if we somehow break the urethane, the mounts won’t let the motor swing over. That situation would be very bad in a car like this that has a solid-arm throttle assembly that would get pinned at full throttle if the motor rotated over too far. |
 |
 |
These motor mount perches are another part of the Chevy 2 Only conversion kit and bolted right on once Jason removed the factory perches. These will place the engine in the proper location, which will help with all the other bolt-on parts we are using. |
|
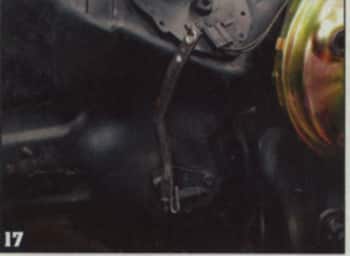
Speaking of the throttle assembly here is the proper arm we needed for a V-8. The I-6 arm is moved over towards the passenger side so these components will help us hook up to the carb without issue. The arm simply bolts to the assembly after Jason removed the factory arm. |
 |
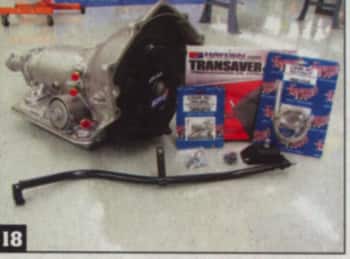 |
Now we moved onto the transmission, as we needed to get it in before the engine. The Gearstar 700R4 is a completely remanufactured and upgraded unit that comes with just about everything you need to install. The technician at Gearstar asked us a bunch of questions when we placed the order so the trans would be set up just right for our Nova. He wanted to know the rear end gears, max horsepower and RPM of the engine, and rear tire size so they could make sure the shift points were set and the speedo would be spot on. |
|
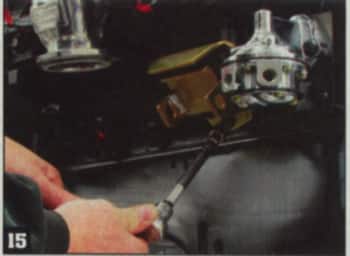
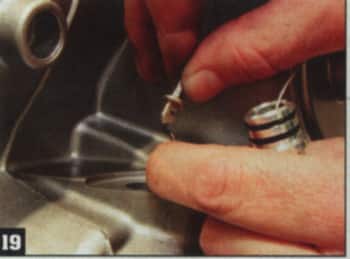
A Lokar kick-down cable is provided in the kit but needs to be hooked to this little tab protruding from the case. The cable is fully adjustable so we can set up the trans perfectly. |
 |
 |
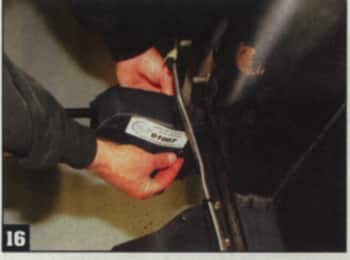
After hooking up the cable end Jason lubed up the O-rings and installed this side of the cable. |
|
The other main component in the trans portion of the swap is this crossmember from Chevy 2 Only. It is a true bolt-in piece and places the trans in the right spot to hook up to the motor. |
 |
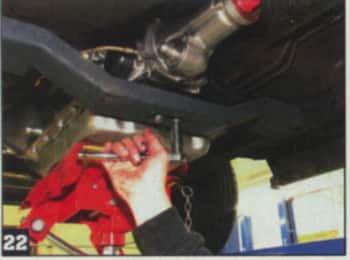 |
After lifting the trans with the proper jack Jason installed the crossmember and the rubber mount that came with the transmission. |
|
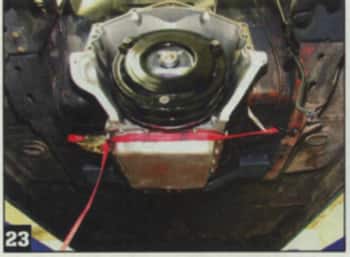
We used a ratchet strap to hold up the front of the trans while we lowered the car to install the engine. Once the car was down we put a jack under the pan so we had the ability to move the trans around a bit to mate it to the motor. |
 |
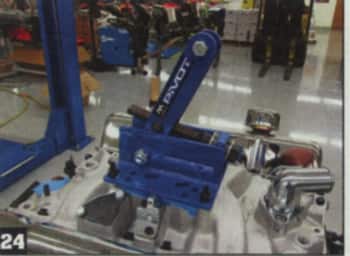 |
To lift the engine and also tilt it to help ease the install we grabbed this Pivot Plate from Mac’s Custom Tie Down. This thing made the install and mating the engine to the trans a lot easier by allowing us to articulate up to 35 degrees. Using it is much better than muscling the motor around by the chains, straps, or what ever we had to lift the motor. |
|
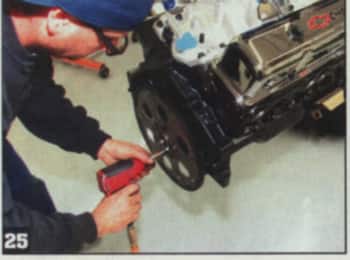
Before the engine could be set in its final resting place, Jason installed the GM 158 tooth flexplate. We ended up using the hardware from the I-6 because I ordered the wrong bolts from ARP, which were too long and had too large of a head. |
 |
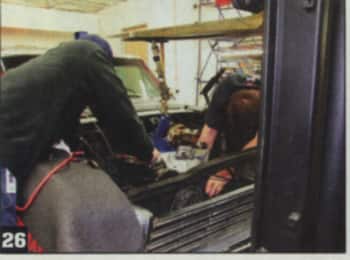 |
Now for the moment of truth, dropping in the engine, and even with the pivot plate we still needed to loosen the trans and the motor mounts just a little to get it in. |
|
After we wrestled with stuff for a bit we had the motor in the hole and mated with the trans. Then it was time to install the torque converter bolts that came with the trans. |
 |
 |
Once thing we overlooked until this point was the oil filter adapter. The engine didn’t come with one and we just didn’t have time to order one. I ended up grabbing one from a different project but the proper part number is listed in the parts side bar, so make sure to get one if you are planning to do this job. Once that was tight I spun on the AC Delco PF454 oil filter. |
|
To turn this sucker over I grabbed this Hitachi starter from my not-so-local parts house. There happens to be no parts stores in Irvine, California, which made getting parts quickly a real problem. The starter is clockable, made to work with both the large (168 tooth) and small (158 tooth) flexplates, and even came with ARP bolts to hold it on. I went with small-body starter to give the exhaust the most clearance possible. |
 |
 |
We had to cut some of the factory fuel line off because it ended right where our new exhaust collector would be . We cut it back by the trans and added the new filter here. |
|
To complete the fuel line Jason took one of the hard lines we picked up at the parts store and bent it so it routed to the fuel pump. There is an art to bending line and we will be doing a whole story on it in Super Chevy soon so keep an eye out for it. |
 |
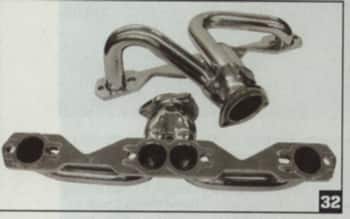 |
With the tight confines of the Nova’s engine compartment we looked to Sanderson for these shorty headers. They feature ultra thick flanges, and we went with the ceramic coating so they will look good for a long time. |
|
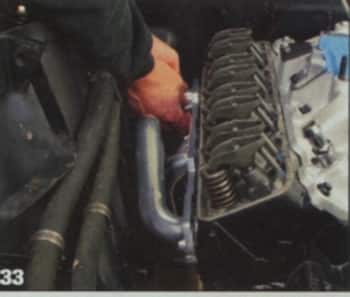
They fit like a glove once I put them on the correct side. Yeah, I had them swapped. The headers are made to just use silicone instead of gaskets so a small bead was laid down around the ports before dropping them in from the top. Just make sure when you install them that you put the flatter one on the drive side and the one with the larger tubes (shown here) on the passenger side. |
 |
 |
Initially we were running a short water pump setup but found out that there is not enough clearance between the strut tower and valve cover for the alternator to tuck in there. We had enough room to run a long water pump so we ordered all these parts from Trans Dapt to use a long water pump. |
|
Jason installed the lower pulley with some of the ARp bolts we ordered. We installed the pump to check pulley alignment, but took it off to paint it. |
 |
 |
While he was there, he slipped the dipstick into the pan and bolted it down with a front header bolt and a spacer made from a piece of tube. |
|
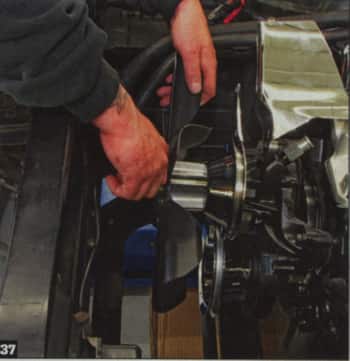
Some of the alternator brackets were installed before Jason tossed on the upper pulley, spacer, and fan. |
 |
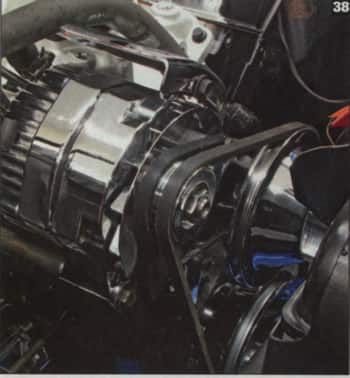 |
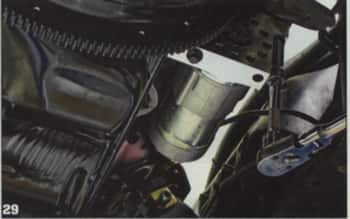
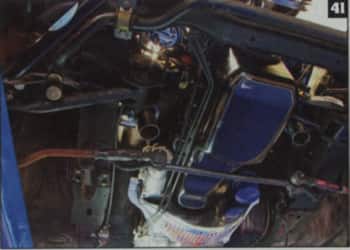
Here is what the alternator set up looks like once it’s all installed. The 63 amp, one wire, internally regulated, GM 10si case, alternator from SUmmit will provide enough juice for what we have in the Nova. The design of the alternator will also make the system much simpler by not needing an external regulator or a bunch of wires running to it. We ended up using a belt we had in our stash that has a part number of 15435 and is 43.5 inches long. |
|
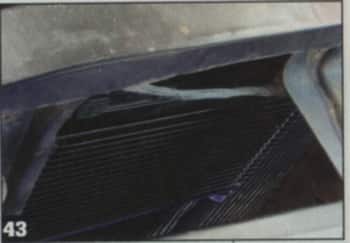
The I-6 radiator just won’t have the capacity to keep the V-8 cool so we ordered this high efficiency copper core 4-core radiator from US Radiator. This is much larger, but still is designed to fit in the early Nova. |
 |
 |
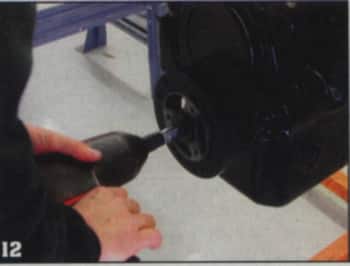
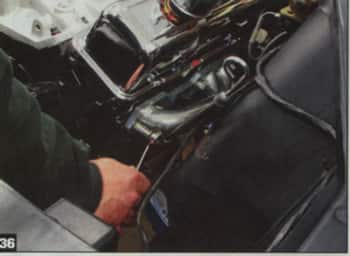
Come to find out the mounting holes on a ’63 I-6 core support are a bit too close together, so Jason grabbed a grinding bit and elongated the factory holes just enough. |
|
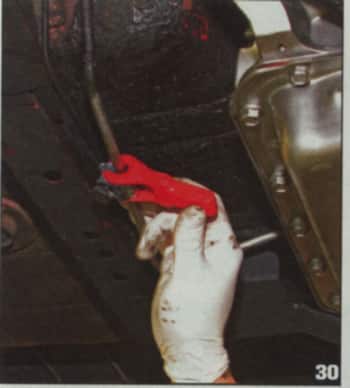
With the radiator in we could move on to hooking up the trans cooler. First we needed to bend new hard lines because the I-6 powerglide didn’t have lines running to it. Jason routed them along the edge of the oil pan and then to the passenger side of the core support. You can also see the new fuel line he bent up earlier. |
 |
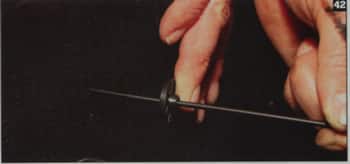 |
We installed the cooler on the passenger side in front of the radiator with the plastic holders provided with the transmission. These just push through the cooler and radiator fins and then these ends come from the back to lock it in place. |
|
Here is a good shot of where we put the cooler. The cooler also came with a section of hose that we used to run from the cooler down to the new hard lines Jason bet up. |
 |
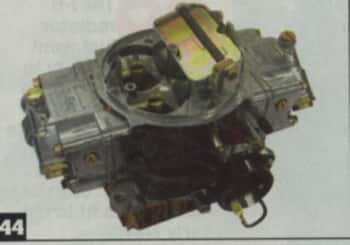 |
The last thing we had time to do was install the 670cfm Street Avenger carb we got from Summit. This is the recommended carb for the motor and features vacuum secondaries, electric choke, and any vacuum ports we may need. We used the carb stud kit from AARP to hold the carb to the manifold. |
|
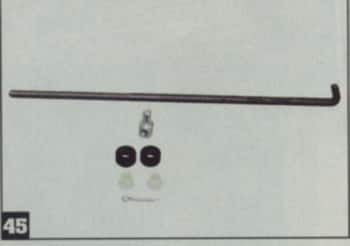
To hook up the throttle arm to the carb we got this rod and install kit from Chevy 2 Only. The rod is the right length but some of the extra threads needed to be cut off so it wouldn’t interfere with the carb. |
 |
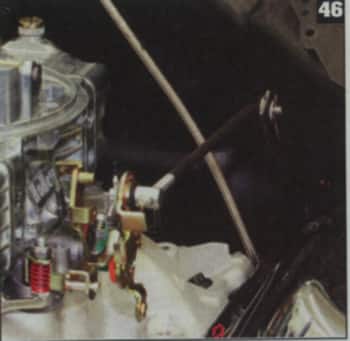 |
Here is a shot of the rod installed with the rubber grommets and plastic inserts taht come in the install kit. About and inch off the threads needed to be cut off so the rod wouldn’t hit the tab protruding from the card throttle arm. |
|
That is where we ran out of time and had to stop. We still need to do a bunch of stuff like prime the engine, drop in the ignition, find radiator hoses before we can even fire it up and break in the cam. We will also need to tackle the exhaust and the drive shaft. All that will be covered in the June issue of Super Chevy. |
 |
Ready to experience top-notch transmission solutions and expert support?