Ford AOD Transmission Installation Instructions
PLEASE FEEL FREE TO CALL US ON OUR TECH LINE AT (330) 434-2757 BETWEEN 8:00 AM AND 5:00 PM EST IF YOU HAVE ANY QUESTIONS.
Please read instructions completely before installing your transmission. Also, we have provided a check list of necessary items to help you along with your installation. Please mark each box after you have completed the step.
REMOVE ALL RED CAP PLUGS ACCORDINGLY FROM YOUR TRANSMISSION DURING INSTALLATION!!!
Transmission Cooler:
External stand alone transmission cooler supplied must be installed or your warranty will be voided.
DO NOT use transmission cooler in conjunction with radiator cooler.
Cooler must be installed in front of the radiator.
Constant, forward air flow is a MUST! If not possible, then you need a cooler with an integrated fan and proper air flow. Either way the cooler is essential to the transmission.
NEVER install the cooler under the floor pan of the vehicle. The best possible place to position the cooler is in front of the air conditioning condenser.
Only use hose supplied with cooler. If more hose is required, use only hose rated for automatic transmissions. DO NOT use rubber fuel line, EVER!!
If using your existing transmission lines, flush thoroughly with brake cleaner before installing new cooler.
Use only Gearstar’s 6 A/N cooler line fittings. Gearstar’s 6 A/N cooler fittings are straight 1/4’” pipe threads.
Using ¼” tapered pipe threads fittings could crack transmission case and will void warranty.
PLEASE READ THIS FIRST
DO NOT REMOVE TORQUE CONVERTER BRACKET UNTIL YOU ARE READY TO INSTALL THE TRANSMISSION.
THE TRANSMISSION AND TORQUE CONVERTER ARE TO BE INSTALLED AS ONE UNIT.
UNDER NO CIRCUMSTANCES SHOULD THE TORQUE CONVERTER BE REMOVED FROM THE TRANSMISSION.
Torque Converter and Transmission Installation:
Make sure dowel pins are clean and free of rust and installed in engine.
Clean crank shaft pilot of any rust or debris and smear light coating of grease in crank shaft pilot. DO NOT use NeverSeize.
Midplate must be between engine side of flexplate and engine block (UNLESS YOU ARE USING AN ADAPTER FROM BENDSTEN’S ADAPTERS). Failure to install midplate will cause zero torque converter to flexplate clearance and will damage transmission pump. Midplates are available from Summit Racing, JEGs or you may contact your engine builder.
Align converter studs with flexplate when securing transmission to the engine block. Misaligned converter studs will damage the pump.
With transmission installed in vehicle, converter stud should rattle right and left between the flexplate.
Torque converter clearance to fly wheel should be at least 1/8”.
Pull converter to flexplate to engage pilot.
Tighten converter nuts one at a time before attempting to rotate flywheel to the next stud. Failure to do so will cause converter nut to hit back of engine block.
Tighten converter nuts to 35 ft-lbs.
Re-torque transmission pan bolts to 10 ft-lbs and check drain plug on transmission pan for leaks.
Linkage:
Transmission selector shaft is a 360 adjustable Lokar
Remove shipping nut and washer from T.V. linkage shaft. Check T.V. Linkage: rotate counterclockwise and release. It should return to its original position on its own (spring loaded). If not gently pull outward on shaft and try again. NOTE: Avoid pushing T.V. lever inward towards the transmission. This may misalign the linkage from the valve body. If it does not move or return to its original position STOP! Call our tech line at (330)434-5216.
T.V. Cable Adjustment:
Do not attempt to set T.V. Cable without pressure gauge.
Follow Lokar T.V. Cable instructions that are packaged with the cable. See amended instructions below.
T.V. Cable must be connected to the carburetor or fuel injection unit.
T.V. Cable controls pressure ride in the transmission in relationship to the amount of throttle being given.
Proper adjustment of the cable is critical for the transmission to operate and function properly.
The T.V. Port is located on the passenger side rear of the transmission. T.V. Prot is marked in red, and on the case.
ATTN: Amended Instruction for Lokar T.V. Cable Application
You must follow our recommended T.V. pressure changes to the Lokar T.V. installation instructions.
Steps 13 to 16 modified pressure adjustments are as follows: 45 to 50 lbs. NOT 35lbs as stated in the Lokar Instructions. This must be done with a gauge.
Fluid:
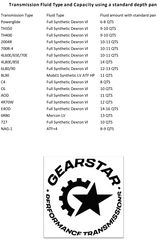
Use a good, high quality automatic transmission fluid, such as Castrol Dextron VI.
Please do not use any purple ATF, such as B&M Trick Shift, this will void our warranty.
Check fluid level while idling in park on a level surface. DO NOT overfill, this may cause oil to leak out of the transmission breather tube.
Check transmission for any leaks around the transmission lines at the cooler and on the transmission itself.
Road Test:
If the transmission is shifting light, tighten throttle pressure cable 1/8” at a time until shift points are within specs. If transmission is shifting late and hard, loosen throttle pressure cable 1/8” at a time until shift points are within specs. If proper shift timing is not obtainable a geometry kit will need to be installed.
Shift points may vary due to differential gear ratios and speedometer calibrations. Shift points should be as follows:
- 1st to 2nd gear up shifts at light to medium throttle should be between 21-26mph.
- 2nd to 3rd gear up shifts at light to medium throttle should be between 32-40mph
- 3rd to 4th gear up shifts at light to medium throttle should be between 45-50mph.
Check the transmission fluid level again.


