Category

Transmission & Drivetrain

Understanding GM 4L80E Transmissions: Earlier Models & Upgrades

GM-4L80E-Performance-Transmission

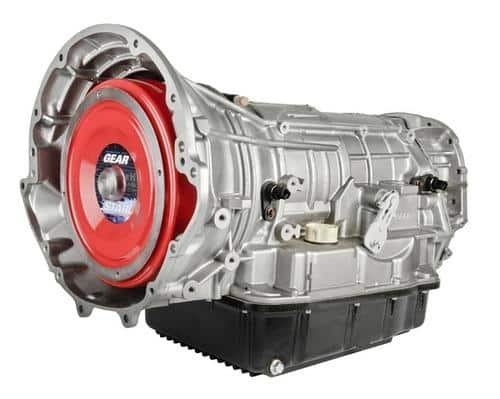
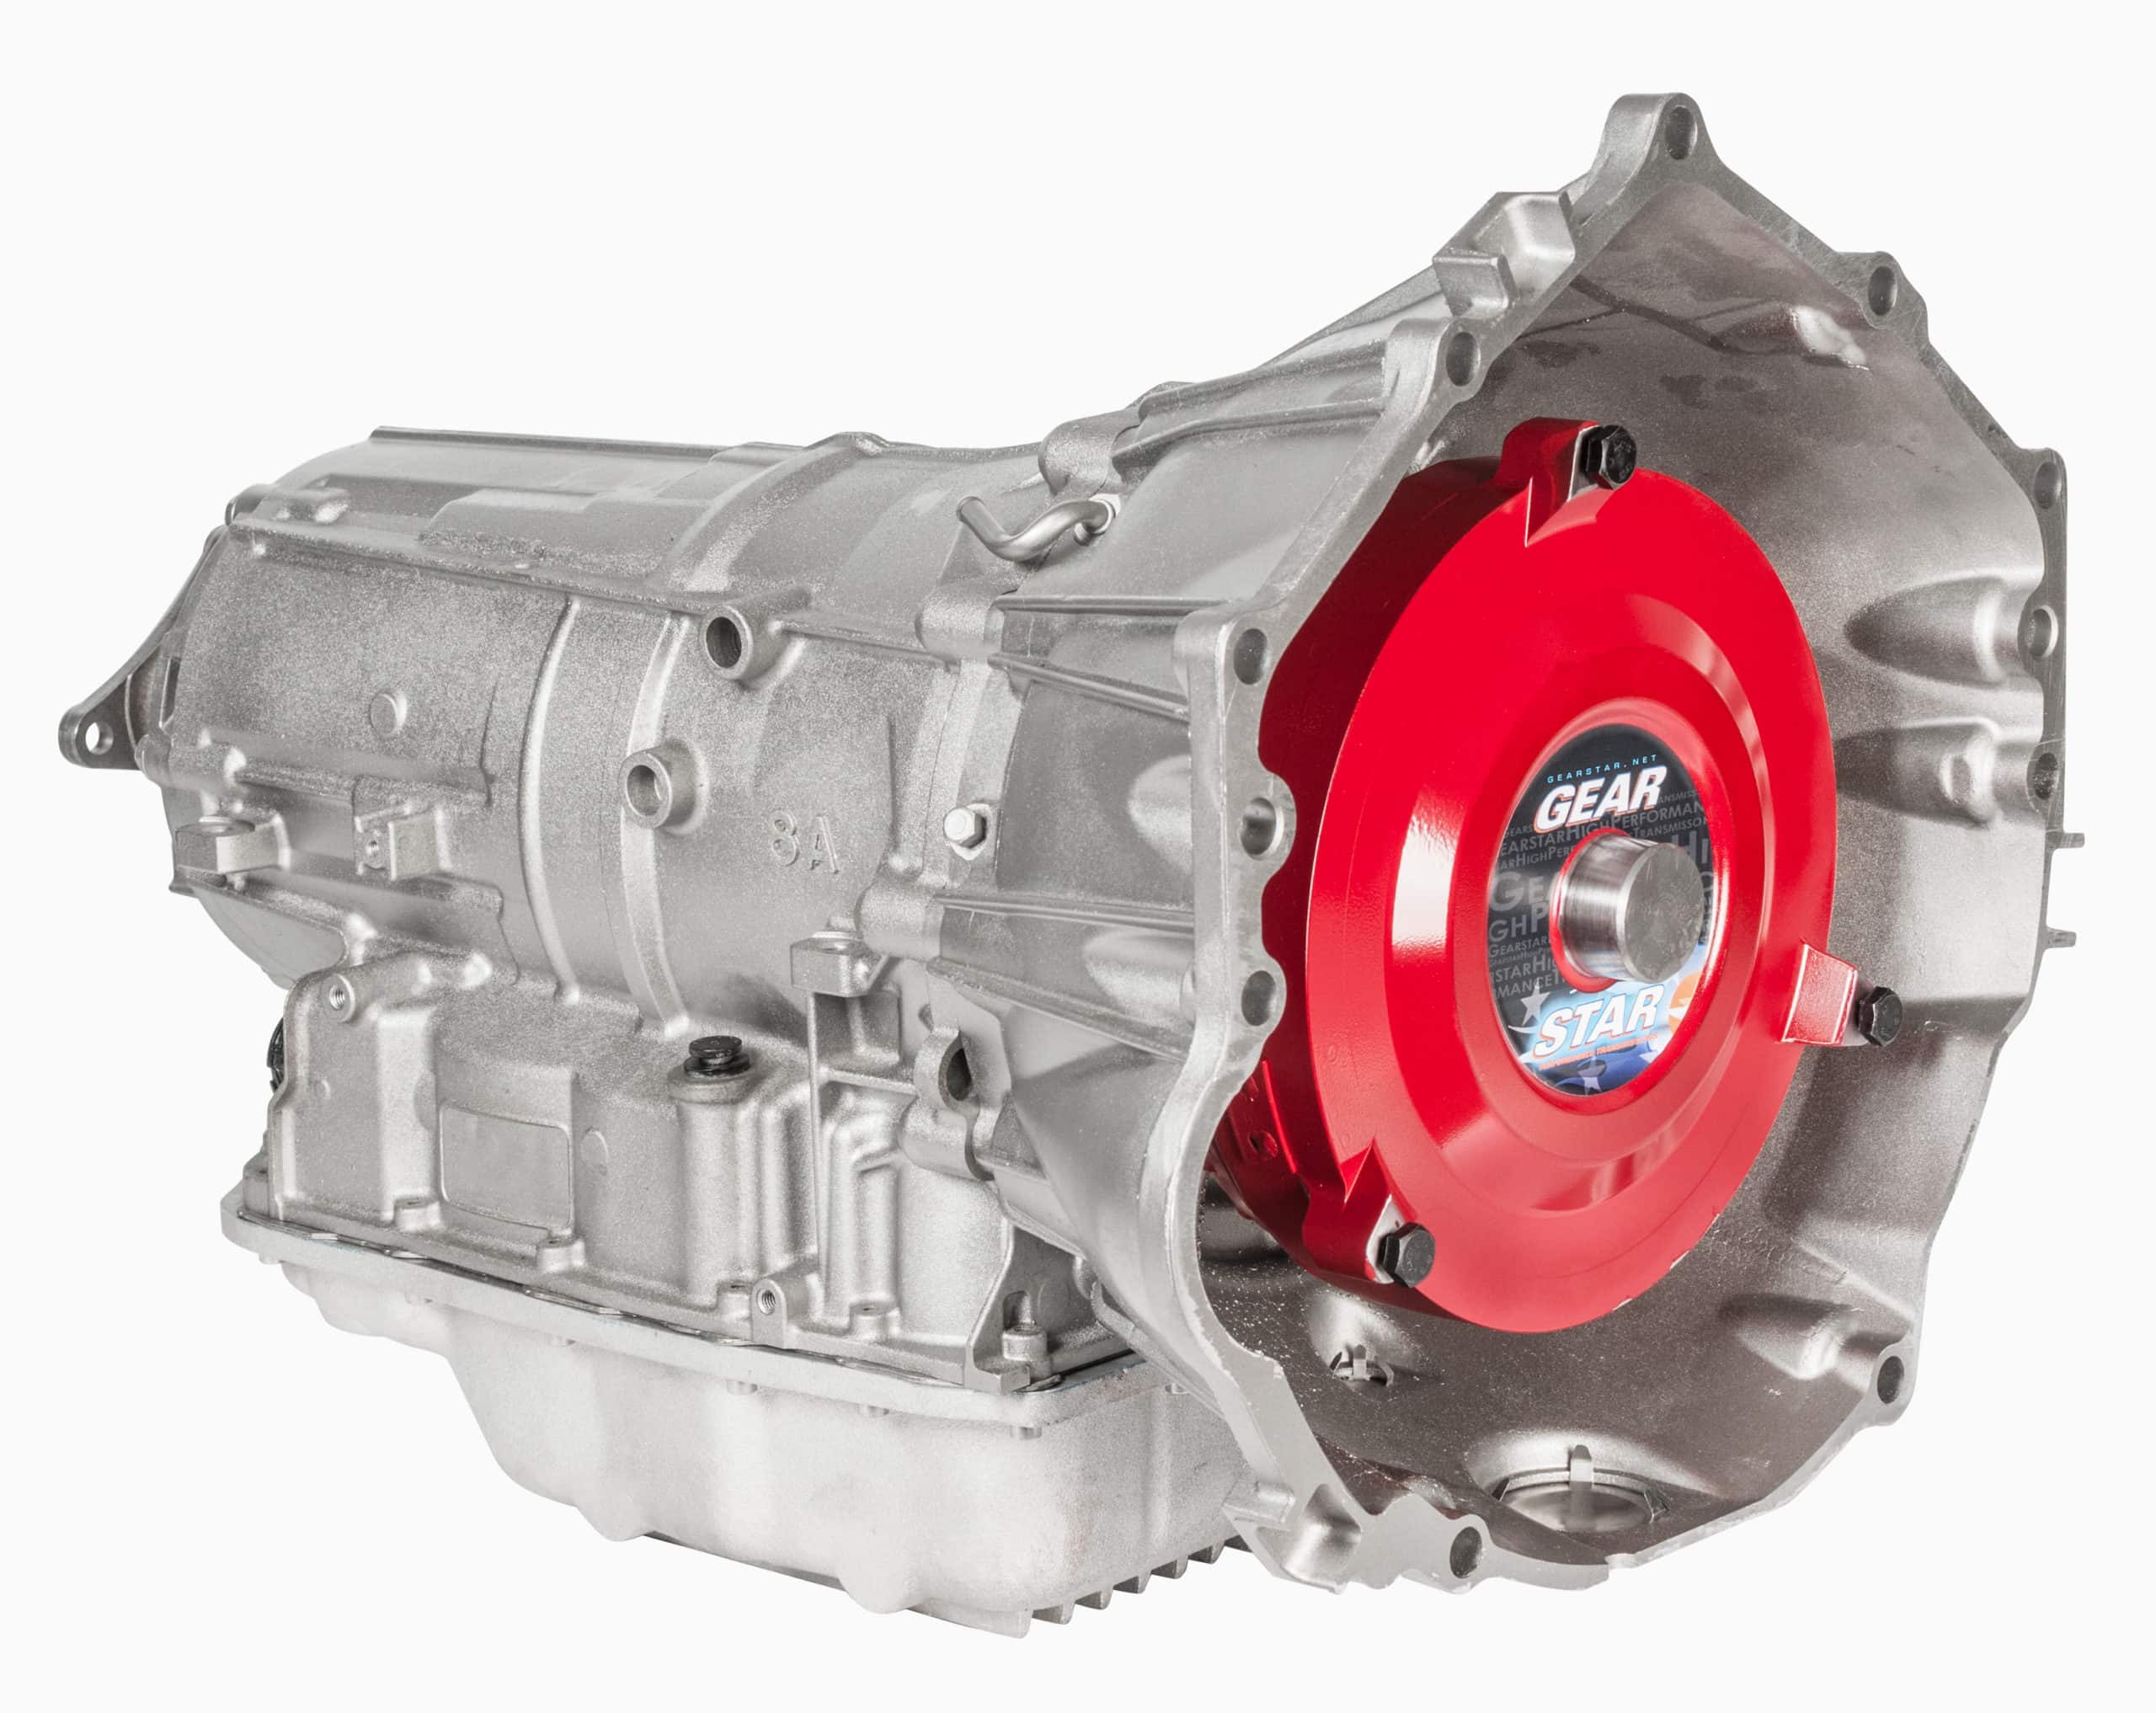
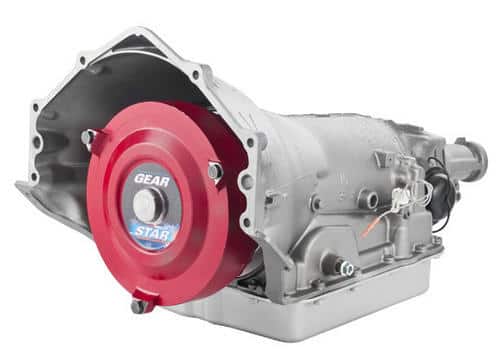
4L80E by General Motors is one of the most popular four-speed automatic transmissions out there. First introduced in 1991, these transmissions went through multiple upgrades that go all the way up to the 2000s. As the transmissions evolved, we got introduced to different characteristics and physical differences. If you are on the market for 4L80E transmissions, you should know about the differences in order to get the right one for your vehicle.

Casting

The oldest 4L80E transmission model was manufactured between 1991-94. On the side of the transmission (on the passenger’s side), you could notice the two core line fittings. This was a major design problem, which would burn up the planetaries. The problem was fixed in the later models with a little change in the casting. A newer transmission model was introduced by GM in 1995 where the case was modified. There was an output line in the front and a return line in the back of the case which would go directly into the center support.

Linkage

Early 4L80E automatic transmission designs had a short linkage shaft, which would just stick out of the case —an inch or so. The later designs had a neutral safety switch mounted on the side of the case, and the shaft was about three inches long.

Electronic Hook Up

Bolt-on harness was built into the earlier 4L80E transmissions but they were later replaced by a snap-on plug which is what GM used all the way up to 2000s. If you have an early transmission that has a screw-on plug, you can get a connector to rewire it to plug into the new switch.

Looking for 4L80E performance transmissions? Get them from Gearstar today! We can custom-build one to fit your need perfectly.

Performance Automatic Transmission Failure: 7 Mistakes to Avoid

Performance Automatic Transmission Failure: 7 Mistakes to Avoid - Gearstar Performance Transmissions

Performance automatic transmission failure may not spring up from thin air. Rather, this failure may be caused by our own making due to certain mistakes. You may have purchased a performance car or truck with one of the best transmissions or even carried out a rebuild.

However, these mistakes could impact on the lifespan of the transmission. Accordingly, we’ve outlined some mistakes to avoid while handling your performance automatic transmission. You’ll find these tips helpful whether you’re a racer or performance enthusiast.

Mistakes to Avoid When Handling Performance Automatic Transmission

Here is a list of things to avoid when dealing with your performance automatic transmission.

1. Using the Wrong Dipstick

It’s entirely possible to use a transmission dipstick that doesn’t take the right oil measurement. When that happens, you’ll be misled to believe that you have enough oil, when in actuality you don’t. Besides, the transmission pan’s width and length in comparison with its shallow depth show that even a quarter of an inch off dipstick reading can be bad. It could mean running your transmission on low oil, which has negative effects.

For starters, you could damage the transmission if you’re using it in a performance scenario with high demand for oil. On the other hand, you can ensure your dipstick gets the right measurement each time by examining the object yourself. You need to fit in the dipstick in place, drop the transmission pan, and then ensure that the full mark is even with the transmission case’s bottom edge.

And if you notice that the original mark on the dipstick is low, proceed to create a new mark on the dipstick. The mark doesn’t have to be something major, but obvious enough for you to spot it out anytime. Now that you have gotten a better-marked dipstick, you’ll get the accurate measurement of the transmission fluid.

2.  Lack of a Transmission Cooler

The regular vehicles come with a transmission cooler located in the radiator. While this cooler may be enough to dissipate heat in regular cars, if your vehicle is built for performance driving, then it needs an extra cooler. The same goes if your engine has been designed to handle high performance or features a higher stall torque converter.

The reason is, the original cooler may not offer adequate cooling to maintain the temperature in a viable range. And heat can lead to major issues in the car, which brings the need for adequate cooling.

To that effect, get an external cooler with a fan which will ensure there is a free flow of air through the cooler. Also, the ideal temperature range of operation for a good number of automatic transmissions is around 165 to 220 degrees.

3. Wrong Line Pressure

The Engine Control Module (ECM) is used by most new vehicles to regulate the transmission’s line pressure and the latter makes such adjustments easy. Tuners may also jack the line pressure up all in a bid to get better shifts, however, there is a need to exercise care. This is because a line pressure that is overly high can lead to hard shifts thereby ruining internal components.

There’s the GM 4L60E, for instance, whose input drum and the input shaft is aluminum and steel respectively. Consequently, the slam shifts of the transmission could crack the drum right where the two parts spline together.

4. Irregular Servicing of the Transmission

It is important to change the transmission fluid and the filter each year. The same applies even if the vehicle is driven irregularly or has been left idle for a long time. For instance, if you tend to use the vehicle on the weekends, the fluid needs to be changed at about every 12,000 miles. There are several reasons why regular change is important.

First off, the engine oil may break down after a while and therefore, not serve the purposes it was intended. These purposes include lubricating the transmission to reduce wear and serving as a hydraulic medium that enables the transmission to function.

The transmission fluid also absorbs heat generated within the transmission and then radiates the heat through the case of the cooler. It is worth noting that the transmission fluid will still serve its purpose as hydraulic fluid over time, but it may not lubricate or dissipate heat properly due to the breakdown of the fluid.

That aside, the filter has to be changed since mechanical parts wear out and create debris that contaminates the fluid. And changing the filter will allow more of this debris to be trapped without entering the oil. A change in the filter is even better than only a transmission flush. This is because the accumulated debris can be removed, thereby unclogging the filter to enable the free fluid flow.

5. Wrong Installation of the Transmission

It’s possible to have wrongly installed the transmission and even the torque converter. Nonetheless, a better approach to install the torque converter is to pour in some ATF into it enhance flow at the first start-up. A quart of fluid should be poured into the converter even before you install it in the transmission. After installing the converter, check if the dipstick reading is correct.

Alternatively, it is important to install the torque converter into the transmission fully before the transmission is placed on the engine block. And do not use force to tighten the transmission to the block by tightening the bolts of the bell housing. You’ll easily know that the torque converter has not been well inserted into the transmission if it won’t fit in place.

6. Bad Throttle Valve Adjustment

Transmissions like the 700R4 fail mostly due to the improper adjustment of the detent cable. The 700R4 uses a cable and fulcrum setup when stroking the throttle valve (TV) in a bid to adjust the line pressure. An increase in the throttle leads to a rise in the line pressure. Contrastingly, the 4L60E uses an electronic pressure control solenoid (EPC) to control the line pressure.

As the throttle increases, this valve causes line pressure to rise for more clutch holding power. Adjusting the valve the right way involves removing the pan and adjusting the cable. This adjustment will ensure that the gas pedal when it is pressed to the floor, the TV valve is completely stroked in.

7. Full Throttle Lockup

The tuner or dyno tester may hit the lockup at full throttle. This setting is not needful if you have more engine power, as well, as a lockup converter. You should not also have the expectation that one lockup clutch can easily handle more horsepower at full throttle.

There are also two options you can select from, and that is choosing between a triple-disc converter or hire a tuner to program the ECM to ensure that there is no full-throttle torque converter lockup.

The Bottom Line

Following the tips outlined above, you can avoid performance automatic transmission failure especially those that stem from mistakes. You’ll know just the right time to change the oil, replace the filter, adjust the line pressure amongst other things. Therefore, if you’ve spent heavily on a high-performance transmission, it can stand the test of time.

GM 4L80-E Transmission Swap Tips and Tricks

GM 4L80-E Transmission Swap Tips and Tricks - Gearstar Performance Transmissions

GM 4L80-E transmission swap tips are needful for anyone looking to revamp the performance of their transmission. The same goes if your ride is used for off-road and racing applications. These tips are from car enthusiasts and lovers of vehicles that can handle the high load that will be thrown at it.

Therefore, you’ll be relying on the most important tips and tricks out there, instead of trying just about anything on your transmission. In the end, the level of performance you’ll get will be more than impressive. With that in mind, here are some of our tried-and-true tips and tricks for swapping GM 4L80-E transmissions that you can try today.

GM 4L80-E Transmission Fluid Levels

If you’ve dedicated the time, money, and energy to your GM 4L80-E transmission swap, it is useful to ensure you have enough oil in it. How can you do that? It’s by using the correct dipstick measurement given that some of these units may not measure the right oil level.

Accordingly, if the measurement reads ‘full’, the dipstick has to be level with the pan rail. This is the case’s flat part where the pan bolts. Therefore, you can take this measurement with the dipstick mounted in the car. Here, you could get the transmission in and bolted to the cross member.

The next step is to drop the pan and assess the stick. Mark a new line on the stick if the right measurement was not gotten correctly. Now you’ll agree that this is an easier process that can save you from damaging your transmission in the long run.

Automatic Transmission Accumulators

It’s possible to block the third or fourth accumulators using a wide range of options. An option is to purchase an accumulator delete plate that will offer high-level performance.

This plate is also not so pricey and it comes with the promise of excellent performance each time. Another option is to resort to the stock accumulator housing and block the feed holes. This blockage can be done with the help of a set screw such as a 5/16″-18 tap and set screw.

It’s worth pointing out that the bore that lacks the pin is for the third accumulator whereas the hole that comes with the pin is for the 4th. Coupled with that, the 2nd accumulator is the case and there’s no need to block it.

GM 4L80-E Transmission Pressure Booster

The GM 4L80-E transmission pressure can be increased using a boost valve. In this case, if you’re getting less than 1khp to the tire, it’s useful to use a valve and sleeve while maintaining the stock pressure regulator spring. Contrastingly, you need to resort to the sonnax spring if the transmission is making over  1khp.

Transmission Snap Ring Enhancement

There’s another enhancement you can carry out and that is the improvement of the intermediate clutch snap ring. Although there is a stock ring, the latter may be too weak to handle the performance required.

Accordingly, settle for a snap ring from a TorqueFlite 727. since it has a level of thickness that will impact positively on your ride. Also, if the clearance is overly tight with the .106, you can opt for a thickness option of .088.

GM 4L80-E Transmission Valve Body Separator Plates

You could take the extra step to drill the plate separator since it can also up performance. Here, the 5/64″ (.078) is suited for lighter cars and even lower power units for 2nd gear. Also, the 3/32 (.093) is ideal for the heavy vehicles around 4k+ lbs.

The 3rd can be fixed in the 7/64 (.110), which is suited for most vehicles, When it comes high hp/heavy, you can resort to 1/8″ (.125) and the same can be said for the 4th. Needless to say, these numbers may vary from one car to the other.

On the other hand, it is worth pointing out that a bigger hole may result in firmer and faster shifts. And if the accumulators have been blocked, it’s ideal to settle for the smaller hole options since shifts will be faster and firmer due to the block on accumulators.

Once that is done, you should also consider replacing the electronics and harness. It’ll not cost an arm and a leg to get this replacement down and you can even replace the EPC solenoid. The latter is useful in controlling GM 4L80-E transmission pressure.

GM 4L80-E TransGo HD2 Kit

The TransGo HD2 Kit may not be the most ideal part to resort to. This is because it dual feeds the direct clutch while also increasing the line pressure. Also, the direct clutch is useful in the reverse gear and the third gear.

Coupled with that, there are two chambers in the apply piston for this clutch. And in the reverse gear, both chambers are used and it’s able to get full apply force. But when it comes to the 3rd gear, only one chamber is used, which helps in reducing the apply area and the holding power.

That being the case, dual feeding the clutch will enable the chambers of the apply piston to also resort to the 3rd gear. On the other hand, if you plan on removing the center lip seal of the apply piston, it may be needful to remove the 2nd sealing ring on the center support.

You may also have to connect the case passage with a 3/8 cup plug in. Likewise, you could tap the center support and install a set screw. And while at it, ensure that the set screw is linked below flush to prevent the non-sealing against the case.

The Bottom Line

Relying on the GM 4L80-E transmission swap tips and tricks above can help you create a transmission that will handle all the load posed at it. These tips can serve you anytime, whether you’re using a new or old transmission. The goal is to ensure you end up with a ride whose performance is impressive. Now if that’s what you’re out to get, try these tips.

3 Signs That Indicate Your Need for a Transmission Upgrade

mopar-performance-parts

While modern-day cars and trucks are very durable and can offer years of reliable service with the right care and maintenance, they do require major repairs as they age. The transmission, for example, might start giving problems and you may need to consider rebuilding or replacing it. Whether your transmission requires rebuilding or a complete replacement depends on a variety of factors. Here are 4 signs, apart from lit-up warning light, that show your transmission needs an upgrade-

  • Transmission slipping– When there is a problem in a manual transmission, it becomes harder for the driver to change gears, or the shifter just pops out of gear. In an automatic transmission, you experience transmission slipping while driving, or a loud thunk when you put it in the drive.
  • Fluid leaks– Pay attention to any puddles or stains underneath your vehicle and try to figure out where they are coming from. The fluid can travel across parts and the frame, making it difficult for you to determine its source. You can try placing a pan underneath the leak overnight and ask a mechanic to look for the problem.
  • Burnt smell coming from transmission fluid– It is important to keep a check on the transmission fluid to ensure that it is healthy for the system. It should have a transparent bright red color and a syrupy thickness. Check if there is a burnt smell or the fluid appears cloudy or brown. It may be a sign of a problem in the transmission.

If you found any of the above-mentioned signs, it’s time you repair or upgrade your transmission system to avoid costly damage. Whether you need Ford, GM, or Mopar performance transmission parts for a muscle car, pro-touring beast, modern performance machine, restoration project, or a daily-driver – Gearstar has got you covered.

GM 6L80E/6L90E Transmission Problems And Performance Upgrades Offered By Gearstar

GM-6L80E-and-6L90E-Transmissions

Starting in the 2006 model year, General Motors released the 6L80E and 6L90E transmissions that developed several issues that tend to frustrate transmission as well as body shop technicians servicing them globally. In this blog, we will try to shed some light on these issues and how you can fix them.

Issues

  • The vehicle not releasing from “Park”
  • Transmission gear shift not moving to “Park”
  • Transmission randomly pops out of “Park” with no one in the vehicle.
  • A loud rattling sound when transmission engages reverse
  • Upon removing the transmission to change the filter, or doing any service to the transmission requiring a refill of the fluid, vehicle not wanting to move or engage the transmission in any range.

The plucking rod actuator assembly GM part number 24200173 has been known to fail and cause most of these concerns. Spring-loaded bullet ends slide off or develops a burr causing the rod to jam. When performing an overhaul, remove the rod and closely inspect for wear or damage. If the vehicle doesn’t move in any range, once you eliminate all other possibilities, the output shaft splines in the 6L80E transmissions or 6L90E transmissions may be stripped away.

Another common problem seen on most wheel drive cars and four-wheel-drive trucks is that moisture gets trapped on the spline and destroys both the trans output shaft as well as the transfer case 4-wheel drive unit splines. On the later versions, hydramatic put an O-ring on the shaft to address this concern. If you are servicing an earlier design shaft with no O-ring, and there is no wear on the splines, you can put an O-ring on the output shaft splines to counteract moisture.

6L80E/6L90E Performance Transmissions Upgrade

If you are looking to get the most of your vehicle with 6L80E /6L90E transmissions and considering a major trans upgrade, Gearstar has the best products available on the market. Our high-performance transmissions —including GM 6L80 (level 1 and 2) and GL90 — are built to the horsepower, torque, and rear gear ratio specs of the engine that it will be matched to. Also featuring a torque converter, the transmissions come with a complete master overhaul kit with new gaskets, seals, rings, and pistons. Wide inlet filter, bearing and bushing kit are also included. If we talk about the clutch, you get expanded capacity1-2-3-4, 4-5-6, 2=6 and3-5 low/reverse clutch packs with latest generation friction and steel.

Other important upgrades consist of:

  • Updated AC Delco pump cover (stator support), body (bell housing), and vanes with hardened rings
  • Hardened Rear Planetary Ass’y
  • Upgraded line boost valve and slide spring
  • Performance-tuned solenoid valve body with new ACDelco transmission control module

All performance transmissions offered by Gearstar are designed for optimum precision, durability, and custom-built by our master technicians from start to finish. They are DYNO-tested with torque converter (the equivalent of 100 miles) to make sure the package stays in perfect operating condition.

Apart from General Motors, we also offer top-quality Ford and Mopar transmissions. Let us help you with what you are looking for!

Why Are 700R4 Torque Converters The First Choice In The Market?

700r4-torque-converter

Choosing the right torque converter for your vehicle can be tricky. You need to weigh in a plethora of factors for getting noticeable improvement in the acceleration capabilities of your vehicle. Regardless of whether you are a street driver or an enthusiastic car racer, you need to follow some basic guidelines for ensuring your car performs to its true potential. This primarily includes the stall speed, power curve, and torque output of the vehicle.

Most modern users opt for 700R4 or the 4L60E torque converters while upgrading to an overdrive automatic. This is due to the fact that both of them are sophisticated solutions and offer ample convenience. However, they mainly differ in terms of their electronic circuitry. Here are a few parameters that give an edge to 700R4 torque converters:

Price

Most overdrive rebuilding options come at a heavy price. If you are planning to upgrade your transmission system, you should consider going for analog overdrive versions. This will allow you to enjoy the benefits at a lower price.

Installation

Unlike 4L60E torque converters, 700R4 can be installed without any hassles. All you have to do is to take care of the TV cable hookup, shorten the driveshaft, move the cross-member, and add a 12-volt source to the transmission.

Simple Conversion

Since 700R4 comes with an old-school speedometer cable, it is much easier to handle. You can upgrade any old chassis by following some minor floor pan tweaking procedures.

When it comes to transmission systems, Gearstar Performance Transmissions has it all covered. Get in touch with them to buy 700r4 torque converter lockup kits for your vehicle.

TH350 Transmission Identification, Decoding and Super-Tuning

TH350 Transmission Identification, Decoding and Super-Tuning - Gearstar Performance Transmissions

The TH350 (Turbo-Hydramatic) transmission identification, decoding, and super-tuning are what sets it apart from other transmissions. Its identification, for instance, helps you to differentiate this one-piece unit from other transmissions launched by General Motors.

And the super-tuning of this unit ensures that you can improve its performance to be a ride worth taking on fast and hard spins. Now this and many more are what we’ve outlined below. Therefore, work with us let’s show you all you need to know about this unit.

TH350 Transmissions 101

The TH350 transmission is a three-speed automatic transmission launched by General Motors in vehicles from 1968. It can also be said this model was created as a collaboration between Chevrolet and Buick, where the transmission was made to be compact, strong, and versatile.

On the other hand, the TH350 was to serve as a replacement to the Powerglide transmission, which is a two-speed automatic transmission. Cars that used the TH350 transmission include those from the late 1960s, as well as some GM all rear-wheel-drive vehicles launched in 1984.

The transmission model was used in these cars until the early 1980s when the 700R4 transmission was launched. That being said, chances that you’re using a GM vehicle with the TH350 transmission are high if the car is a model launched around these years.

TH350 Transmission Identification

The TH350 transmission is 21-3/4″ long and its body is made of aluminum alloy. The unit comes with a bell housing and weighs 120 lbs. Here is a list of steps that will help you to identify the TH350 transmission:

1. Set Up the Wheel Chocks

Adjust the wheel chocks at the back of the tires to ensure that the vehicle is firmly rooted to the ground. Use your jack to lift the vehicle slightly while also ensuring that the jack sits securely beneath the frame rails.

You can then lower the car onto the stands. Slide beneath the vehicle and find the transmission. This transmission is mostly stationed at the rear-wheel of cars hence, its location may be the same in yours.

2. Count the Number of Bolts

Ascertain the number of bolts that are secured to the transmission oil pan. And if the number of bolts is around 13, then it means the unit is either a TH350 or TH400. On the other hand, the transmission oil pan is usually bolted to the transmission bottom.

However, you can tell if it is a TH350 or TH400 depending on the transmission oil pan’s shape. If the pan is square in shape and looks five-sided due to a cut in one corner, then you are dealing with the TH350.

3. Check the Length of the Transmission

It is also important to measure the length of the transmission. This measurement should be taken from the front and from where it bolts to the back of the engine to the transmission’s end that links the tailshaft housing.

On the other hand, there’s no need to measure the tailshaft housing and this is an adapter with a cone-shape design. It is worth noting that the length may range from 22 ¼ to 22 ¾ inches if it is the TH350 transmission.

4. Find the Vacuum Modulator

The next step is to find the vacuum modulator. This modulator has been stationed at the transmission’s side and there may be a rubber vacuum line connected to it. You’ll know it’s the TH350 if you have the fitting attached to the right frontal side of the transmission. However, it is the TH400 if this fitting is at the transmission’s front-rear side.

5. Check the Connection

There’s a cable that may be connected to the transmission’s side and next to the location of the shifter linkage. In this case, you are to ascertain if the cable is connected to the engine. The cable is a kick-down cable and the TH350 has this cable whereas the TH400 does not have this feature.

TH350 Decoding

One more thing you can fall back on to identify the TH350 is the stampings placed on the transmission’s side. The part codes that may be evident include the M33, M38 & M39 and these codes were for the conventional TH350.

On the contrary, the TH350C, a variant of the TH350 that has a lock-up torque converter had codes including MV4, MX2, MX3 & MX5. Asides from this, other variants of the TH350 were launched and these are the TH200, TH200C, TH250, TH250C and TH375.

TH350 Super-Tuning

Super-tuning the TH350 transmission involves modifying the stock transmission to ensure it is suited for street or strip use. The stock transmission may be able to withstand the impact but only to a certain degree, which brings about the need for super tuning to handle high-performance applications.

And using this transmission comes with an advantage since many car enthusiasts believe that out of all GM transmissions, it is the budget high-performance automatic ride. Therefore, you can carry out inexpensive changes to this transmission even without taking it out of the car. Here’s what you need to begin:

1. Modifications to Certain Components

Changes in components like the governor alterations, valve body recalibration, and modulator swaps can improve the TH350 transmission. By improvement, you can expect enhanced shift timing. These modifications can be made without removing the transmission from the car.

2. Upgrades

Specific upgrades are needed if your transmission will be used in applications that transmit 400 lbs-ft of torque or higher through the transmission. The limit will be dependent on the vehicle’s gear ratio, weight, driving style, and even traction.

3. Other Minor Upgrades

A TH350 rebuilt is not complete unless you have a high-performance clutches and even reducing the friction. This setup will enable the transmission to send more power to the wheels, which could also increase durability.

And if you’re wondering how you’ll reduce the unit’s friction, you can start by using needle roller bearings. These bearings can be used at the front planetary pinion carrier as well as the rear planetary ring gear.

The Bottom Line

Now that you know the TH350 transmission identification, decoding, and super-tuning, you have a better knowledge of your transmission. In the same vein, you’re well informed on how to improve it to be more durable and handle street racing. And given that this is a transmission that has stood the test of time, its rebuild will yield even more impressive results.
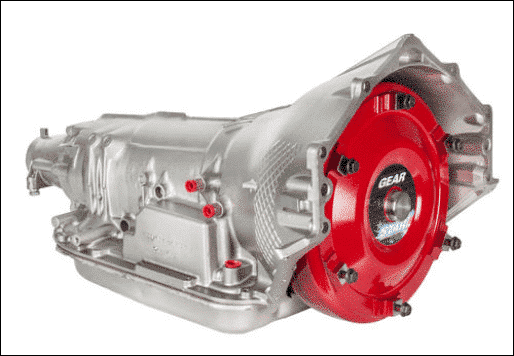

How to Update Your Vehicle’s Transmission Systems to Factory Specifications

Automatic-Transmission-Rebuild-Kits

An efficient transmission system is essential for the smooth functioning of any vehicle. When you start experiencing unusual sounds, odd odors, delayed movements, or fluid leaks in your car, it is the right time to go for quick repair service. In such scenarios, users can either replace their transmission systems or rebuild it with the help of specialized kits.

Rebuilding a transmission system is always a better option than replacing it entirely. There is no point in getting the entire system changed when you can get the damaged parts fixed at a much lower price. Once the system has been taken apart, any damaged component present inside can be quickly replaced. For a durable rebuilding, the following components are essential:

Soft Parts

This comprises all the transmission parts that wear out easily and degrade the overall efficiency of the system. A master rebuilding kit consists of spare clutches, bands, seals, gaskets, bushings, bearings, and sealing rings for replacing the damaged ones.

Hard Parts

This includes additional hardware components including solenoids and transmission cases that are essential for completely upgrading a transmission system. It is better to opt for automatic transmission rebuild kits that come with these components to avoid added expenses.

Transmission Fluid

High-quality transmission fluids are essential for thorough cleaning of the system. These fluids are vehicle-specific and should be used only if they comply with the technical specifications of the manufacturer.

Gearstar Performance Transmissions is a dedicated supplier of high-performance automatic transmissions built by skilled technicians. If you want to buy automatic transmission rebuild kits, Gearstar Performance Transmissions is a good way to go.

What Is a Lockup Torque Converter?

What Is a Lockup Torque Converter? - Gearstar Performance Transmissions

Have you ever wondered what a lockup torque converter, or when should a torque converter lockup? If you have, then let’s explain each of these to you, and generally, all you need to know about a torque converter. But first off, you already get the picture that this is a major component in your car. And that being so, its function aid the car’s performance.

Understanding Torque Converters

A torque converter is a coupling that sends rotating power to a rotating driven load. This power moves from the prime mover such as an internal combustion engine before it gets to the load. It can, therefore, be said that the torque converter creates a connection between the power source and the load in an automatic transmission.

This component is also connected to the flexplate directly, and the latter connects directly to the crankshaft. A torque converter has the major characteristic of multiplying torque if the output rotational speed is low. And this multiplication enables the fluid from the turbine’s curved vanes to deflect off the stator.

The early designs of the torque converter caused an RPM slippage of fluid between its turbine and impeller. When that happens, there is often a disturbance in the oil and this turbulence leads to the generation of heat. Automakers began to use air vanes positioned outside the torque converter in a bid to reduce the heat and cool the oil.

Nonetheless, this structure was used in small vehicles and it showed very little success. The oil was moved through the transmission cooler just to reduce the heat, but at the expense of energy and fuel being wasted.

What Is a Lockup Torque Converter?

Lockup torque converters are a type of converter that has a clutch. The engagement of this clutch causes the engine to lock to the transmission input shaft thereby leading to a direct 1:1 drive ratio. A lockup torque converter is used since it offers fuel economy, enabling you to use fuel minimally while on that joy ride.

History of Lockup Converters

Lockup torque converters gained popularity when it was discovered that manual transmissions are more fuel-efficient than automatic transmissions. The old torque converters also led to a loss in RPM between the gearbox’s crankshaft and input shaft. For this reason, it earned automatics the name slushbox at the time.

On the other hand, car manufacturers had to meet fuel economy targets set by the government. Accordingly, automatic transmissions were made to have an overdrive which helps to improve fuel economy. And this overdrive enabled the engine to turn while in lower RPM as the vehicle accelerates at a fast speed.

While this was an advantage, it wasn’t all so rosy when the engine turned slowly given that there was a slippage of the torque converter. As the torque converter slipped, it generated heat, which could potentially affect the converter and transmission negatively.

This heat also impacted on fuel economy, thereby overriding the purpose the overdrive was used in the first place. Accordingly, a lock-up of the converter helped to curb this slippage, and at the same time reduce heat and improve fuel economy.

Stages of Operation

The operation of the lockup converter is a bit complicated but one can still gain an understanding of it. In this case, there is a lock of the turbine to the torque converter’s case by the hydraulic pressure and this occurs when the crankshaft and input shaft are to turn at the same time while driving.

The engagement of the lockup clutch causes the fluid in the converter to rotate and at a speed similar to other components of the converter. The good thing is, heat is curbed significantly and so is the oil turbulence. The movement of the fluid can be attributed to the circulation which cycles the fluid through the cooler.

Furthermore, the lock-up mechanism takes advantage of a frictional clutch which is managed by a hydraulic pressure circuit. The engagement of the mechanism causes the components of the torque converter to serve as a rotating flywheel mass. As a result, this helps to reduce the load on the radiator while promoting fuel economy.

Lockup Torque Converter Failures

A torque converter lockup clutch may fail and there are different ways this failure can occur. For instance, this component can remain locked up, and as such, it causes the engine to stall as the car is braked. Another way it can fail is if the component does not lock and that results in increased fuel consumption as well as radiator temperature.

Finally, the converter can tend to slip when it is engaged, thereby allowing the engine speed to increase at a constant speed. It is worth noting that a torque converter may not lockup for the following reasons:

    • A cold engine temperature: There are cases where the converter may not lockup except the coolant temperature reaches 120°F.
    • Lockout of the overdrive unit: An overdrive unit that is locked-up causes the torque converter lockup to also be locked out.

Signs of a Failing Torque Converter

There are times when your lockup clutch will not engage, and you can easily spot out when that happens. To this, you need to pay attention to the transmission shift timing and quality. You can also use an auxiliary tachometer since there are cases where the lockup clutch engagement may be gentle with a minor change of engine speed.

On the other hand, torque converters will tend to unlock from the application of the brake or at the release of the throttle. The disengagement of the clutch may be easier to spot out compared to the engagement, given that it occurs gradually in some cars.

The Bottom Line

A lockup torque converter is important in automatic transmissions to reduce slippage. And once slippage is curbed, heat generation is minimal while fuel economy is improved. This and many more have been outlined above to give you an insight into this component and why you may need one.

Upgrading Your Ford C6 Transmission for Modern Toughness

Upgrading Your Ford C6 Transmission for Modern Toughness - Gearstar Performance Transmissions

You can upgrade your Ford C6 transmission to ensure it can meet the modern-day expectation of performance and toughness. This may be a classic ride, but the mere fact that it was built to offer long term durability means it can be revamped to handle whatever you throw at it. To think that this transmission was once built for the most powerful Ford engines back in the 1970s and specifically high-performance sedans and Mustangs, a lot can be expected after its rebuild.

Therefore, the outcome is quite promising since you already have something solid to work with. You only need to find the best parts out there that can take this transmission’s performance one step further to ensure you get the best horsepower. Read on and we’ll show you how to make your C6 transmission rugged enough to offer more impressive performance.

Overview of the Ford C6 Transmission

For the uninitiated, the Ford C6 was designed by Ford Motor Company and it was prevalent between 1966 and 1996. This is a heavy-duty three-speed automatic transmission and upon its launch, Ford marketed it as the SelectShift Cruise-O-Matic.

The Ford C6 featured a less complex build, lighter weight, greater torque capacity, and less power loss compared to its predecessor, the MX transmission. These capabilities were achieved without a larger build compared to the design of its predecessor.

Interestingly, the C6 was also the first automatic transmission built to be compatible with the Borg-Warner flexible shift band in a bid to improve its service life and durability. Cars that used the C6 transmission include the:

    • 1978–1991 Ford Bronco
    • 1967–1996 Ford F-Series
    • 1964–1970 Ford Fairlane
    • 1966-1974 Ford Galaxie
    • 1966–1980 Ford LTD
    • 1977–1979 Ford LTD II
    • 1966–1979 Ford Ranchero
    • 1966–1979 Ford Thunderbird
    • 1968–1976 Ford Torino
    • 1966–1979 Lincoln
    • 1966–1969 Mercury Comet
    • 1967–1973 Ford Mustang
    • 1967–1978 Mercury Cougar
    • 1966–1972 Mercury Meteor
    • 1968–1976 Mercury Montego
    • 1968–1974 Mercury Monterey
    • 1977 Mustang Cobra 2

Accordingly, if your ride falls among this list, let’s show you how to upgrade your C6 transmission to handle the challenges it’ll face while gliding on a modern road. It may be a transmission used in classic cars, but it can still be a ride you’ll enjoy cruising around town.

How to Upgrade Your Ford C6 Transmission

You can try the following to beef up the performance of your C6 transmission:

1. Custom Parts

The C6 transmission boasts of being lighter than the MX transmission, however, it still has a lot of weight when it is not compared side-by-side with its predecessor. The effect of this heavyweight is seen in the loss of horsepower as parts and pieces of the transmission try to turn.

On the other hand, combining custom parts with certain C6 components can help to reduce the loss of horsepower. In line with that, a modern 4R100 electronic-overdrive can also be paired with this mix to ensure the transmission can withstand high impacts it will be susceptible to.

2. Valve Body Upgrades

The valve body of your C6 transmission can also be upgraded to enable automatic shifting. A valve body shift kit also comes with the promise of giving firmer shifts and can eliminate problems such as band failure, clutch chatter, and premature clutch.

And while at it, a trans-brake can be installed which will be most appreciated if you’re a drag racer. Another consideration is the use of thicker high-performance bands or optionally settling for a deeper oil pan.

3. Bell Housings

The stock case can be mounted with an SFI-certified bell housing, which could push the horsepower even further. If you’ll like a clearer picture of what to expect, then that horsepower may be around 1,000 hp, 2,000 hp, or more.

4. C6 Planetary Carriers

Switching to C6 planetary carriers that are stronger can also improve the performance of your transmission. Here, the new planetaries can surge the transmission’s horsepower to over 2000 hp, and the latter can be expected if a change has been made to the input shaft.

What’s more, the clutch packs can provide better surface material as well as more clutches to support greater gripping power. Needle bearings are also used to replace thrust bearings in several of the rolling components to reduce friction.

5. First and Reverse Planetary Gearset

There is a three or four pinion unit in the First and Reverse planetary gearset. This unit is made of aluminum and it can be replaced with a six-pinion planetary gearset that is made of steel. An increase in the number of pinions aids in the distribution of load and the change in the material makes the unit stronger.

6. Lincoln Drum

A Lincoln drum can be used in this transmission. This drum has higher snap-ring groove and as such, it can support the installation of more clutches. While the stock Lincoln drum may feature four clutches, up to six clutches can be fitted in it to offer a higher level of grip.

7. Aftermarket Clutches

There are less thicker aftermarket clutches you can rely on instead of the stock clutches. Let’s take for instance a clutch that is 0.0065-inch-thick instead of the stock clutches that is 0.0080-thick. Choosing less thick clutches provides space for stacking.

8. Gear Ratios

The C6 transmission comes with First, Second, and Third gear ratios that are 2.40:1, 1.40:1, and 1:1 respectively. Nonetheless, a wide-ratio gearset can be used to provide a First gear ratio that is numerically larger.

The result will be 2.72:1 and 1.54:1 for the first gear and second gear, respectively. Opting for a higher first gear ratio would be especially beneficial if you have a heavy car,  which makes the gear act faster and there’s no increase in the driving RPM.

The Bottom Line

These are the tips you can use to upgrade your Ford C6 transmission and give it that level of performance you believe it can achieve. What’s more, you get to know about the transmission you’re using and why it is a good choice for an upgrade of this type. For starters, it was built with the intention to be tough hence the foundation was set already.

Nonetheless, you can fall back on the expertise of a professional to help you out if you’re uncertain about how to carry out these upgrades yourself. Give or take, you’ll spend a few hundred bucks in a transmission repair shop, which will save you from ruining your transmission while on a quest to experiment.