Upgrading Your 6L80 Torque Converter: Performance and Benefits
SUMMARY: The 6L80 transmission, a reliable 6-speed GM system, can develop performance issues due to its stock torque converter’s wear. Upgrading to a high-performance converter enhances heat management, torque multiplication, and durability, addressing common failures. Learn why replacing your 6L80’s torque converter is crucial for longevity.
One of the most prevalent problems of early 6L80s is the torque converter’s tendency to wear out, leading to slipping, vibration, and transmission overheating as metal shavings from poor torque converter durability often lead to a compromised transmission pump, causing a drop in pump volume and pressure, meaning the transmission begins to struggle to get in (and stay in) gear.
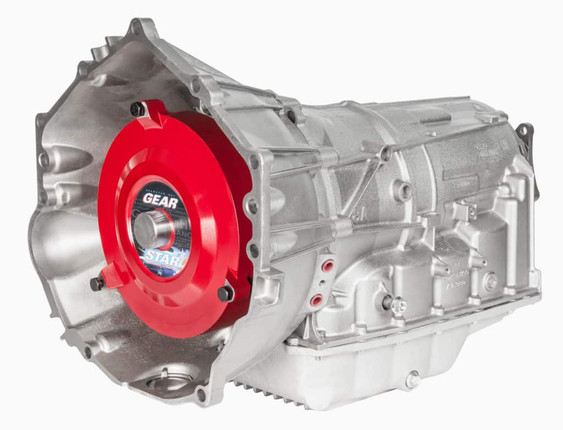
Replacing the torque converter on a relatively unused stock 6L80 can improve durability and extend the transmission’s lifetime while being a practically mandatory upgrade for 6L80s intended for high-performance or heavy-duty use. A high-performance torque converter with a billet cover enhances power efficiency, improves torque multiplication, and ensures durability in demanding conditions.
Why Bother Replacing Your Torque Converter with a Billet Cover?
The torque converter’s job is to enable translation between the engine’s flexplate and the transmission via a fluid coupling, as opposed to the mechanical clutch of a manual transmission. In the 6L80, the internals of the stock torque converter contain a single-disc lockup clutch plate which, over years of use, flexes and eventually shreds itself apart against the piston, flinging metal chunks throughout the transmission’s fluid pump.
Many trucks built with the 6L80 transmission have been reaching serious points of transmission failure over the last few years, highlighting the consistent problems with the 6L80’s torque converter. If you’ve been experiencing some transmission performance problems in your truck – especially as it reaches above and beyond 100,000 miles – then the torque converter on your 6L80 may be the main culprit, particularly if you use your vehicle for towing and hauling.
At that point, however, replacing your torque converter is a bandaid solution for a problem requiring invasive surgery, or even a total replacement. If your transmission fluid pan is chockful of metal fragments, chances are that the pump and housing have been damaged to the point of requiring re-machining.
An upgraded torque converter is ideal for various applications, ensuring it meets the diverse needs of different vehicle types, including towing, hauling, and high-performance driving.
However, if your 6L80 is doing just fine, then replacing your torque converter earlier rather than later can save you a small fortune in repairs or replacements, and greatly improve the longevity of your build.
In short, replacing the stock torque converter with an upgraded version addresses many of the 6L80’s inherent issues, such as heat management, torque multiplication, and longevity. To sweeten the deal, non-stock torque converter replacementsfor your 6L80 can greatly improve performance and transmission longevity by offering different stall ranges tailored to your vehicle's setup.
Steps to Replace a Torque Converter in a 6L80 Transmission
Preparation
Start by gathering what you need, including a socket set, torque wrench, and transmission jack. You’ll need your replacement torque converter, a change of transmission fluid (plus your catch tray/pan), and if necessary (depending on what your converter kit calls for), you may need replacement seals, gaskets, and some fittings for your cooler lines.
Make sure your vehicle is set up on stable level ground and set up your jack for adequate working clearance. Disconnect the battery, drain your transmission fluid, and double-check for metal debris.
Removal Process
Use a marker to label the position of the driveshaft relative to the rear axle flange for proper alignment during reinstallation. Then, use the socket set to loosen and remove the bolts securing the driveshaft to the rear axle. Support the driveshaft to prevent it from falling when detached.
Slide the driveshaft out from the transmission tail shaft carefully, being mindful of any remaining fluid that might leak. Next, start by unplugging the wiring harness attached to the transmission. Label connections if needed to simplify reassembly. Detach transmission cooler lines by using line wrenches or quick-disconnect tools. Again, be prepared for a small amount of fluid to drain.
Place a transmission jack beneath the transmission and secure it with straps to prevent movement during removal. Loosen the bell housing bolts in a star pattern to prevent stress on the transmission case. Keep the bolts organized for later use, and make sure you don’t lose them.
After removing and lowering the transmission onto your work surface, examine the transmission’s input shaft for wear or damage before removing the old torque converter. Carefully pull it straight off the input shaft. Avoid tilting or jerking motions to prevent damage.
Installation Process
Fill the torque converter with clean, new transmission fluid (approximately 1-2 quarts). This primes the converter and ensures immediate lubrication during operation. Verify that the torque converter splines and mounting surfaces are free of debris or imperfections that could impede installation. Carefully slide the new torque converter onto the input shaft. Rotate the converter gently to engage the splines and pump drive. Push the converter fully onto the input shaft until you feel it “click” into place at three stages: splines, stator, and pump drive. Check clearance to ensure proper depth.
Using the transmission jack, raise the transmission and align it with the engine block. Start threading the bellhousing bolts by hand to avoid cross-threading. Reattach the wiring harness, cooler lines, and any brackets. Ensure all bolts and fittings are torqued properly. Slide the driveshaft into the tail shaft and reattach it to the rear axle flange. Tighten the bolts securely.
Home stretch now! Add transmission fluid through the dipstick tube or fill port as specified in your car’s service manual, or according to 6L80 specifications. For reference, the 6L80 holds about 13.2 quarts and uses Dexron VI.
Start the vehicle and allow it to idle while shifting through all gears to circulate fluid. Get your temperature up to about 100 before going through your gears. Don’t get it too high! If you’ve brought your transmission temps up to over 120, turn the engine back off and wait a while before trying again. Check for leaks at the cooler lines, transmission pan, and torque converter housing before giving your car a road test.
Finally, drive the vehicle to verify smooth shifting and proper engagement. Monitor fluid levels again after the test drive, as some air may have worked its way out of the system. Monitor temperature again, to see if it’s within normal levels. Monitor your transmission for new and exciting (i.e., frightening) noises. If everything seems in order, then you’ve done well!
Conclusion
Upgrading the torque converter on a 6L80 transmission is a vital step for addressing inherent reliability issues and extending its life, particularly in heavy-use or high-performance vehicles. With proper preparation and care, the process ensures smoother shifts, better power delivery, and enhanced transmission longevity.


